This is a review of IBOX Mini multi-function single board computer from iTead Studio. The iBox has received some fame by raising funds through the crowdfunding site Indiegogo (it exceeded the intended target considerably). A friend gave tip that iTead Studio was looking for bloggers to review the iBox product. I submitted request to them and I received IBOX sample.
IBOX is a Mini multi-function computer. It can run Android and Linux, and with external function expansion modules it can be used in various applications. The iBox has been raising funds through the crowdfunding site Indiegogo.
IBOX is based in Allwinner Technology A20 Dual Core SoC embedded board solution (ITEAD A20 core board) from iTead Studio. IBOX is built using modular appriach: iBox is a core board plus a baseboard and plus a case.
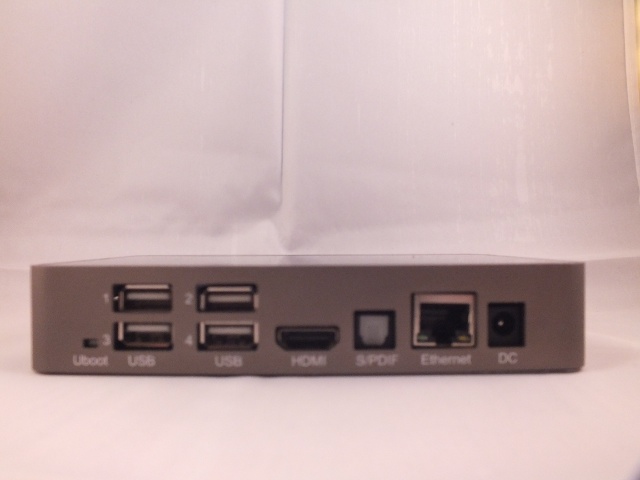
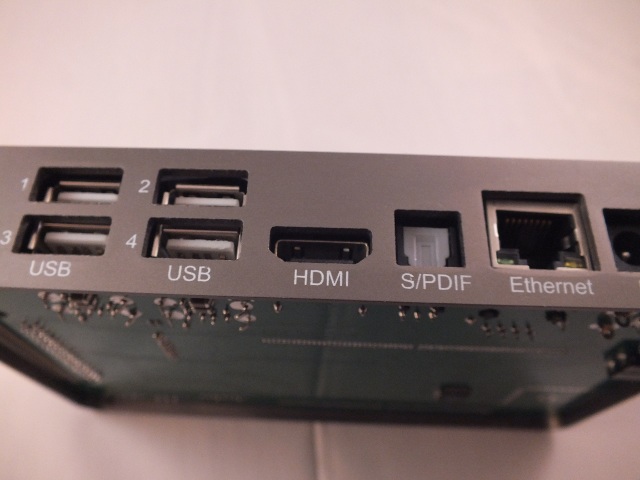
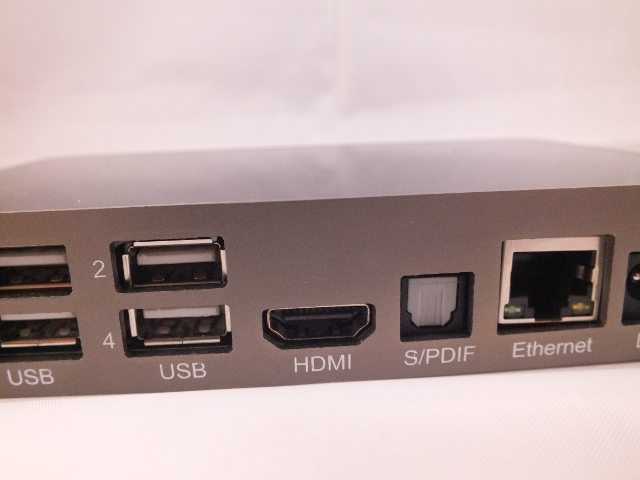
The hardware configuration is: Dual-core ARM Cortex-A7 CPU, Mali 400 MP GPU, 1GByte DDR3 RAM and 4GByte NAND FLASH. At the performance level this kind of hardware is comparable to smart phone or tablet. The interfaces on the devices are HDMI, Ethernet, 4xUSB 2, optical SPDIF (Toslink), 32-pin expansion connector and power connector. IBOX Indegogo page has a good overview picture of the interfaces:

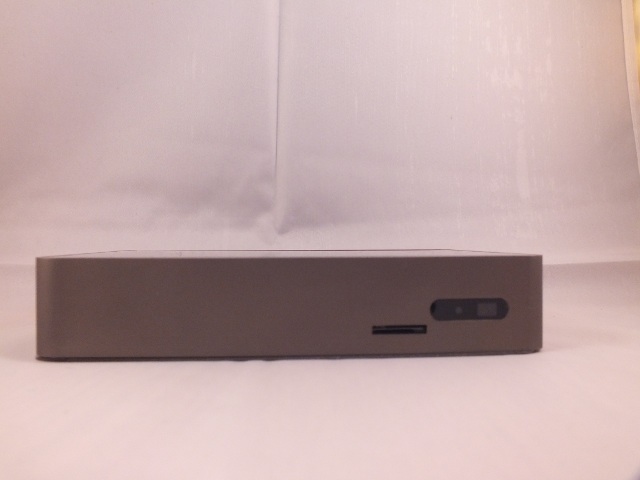
There is a built in infrared receiver for a remote control. This connection set allows the box to be used for example as media box that plays back videos from Internet. The Android system installed to the box also support this.
With the estimated price to be around $70-$90 including power supply and case this product looks like a promising deal. IBOX is more expensive than it’s closest rival, the Raspberry Pi, but it is close enough where it’s aesthetic and performance advantages.
The device
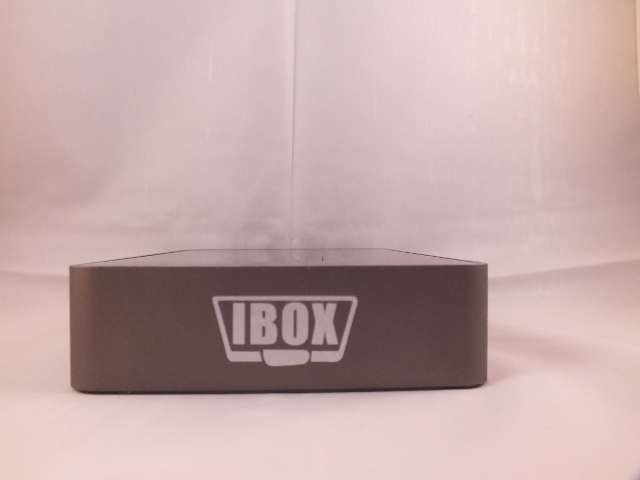
The IBOX in the case looks like a very well built product. The case made of metal and plastic looks good and feels solid. The IBox computer comes in gray-anodized aluminum box. The sides are made of aluminum profile, there is a steel bottom plate and a plastic top.
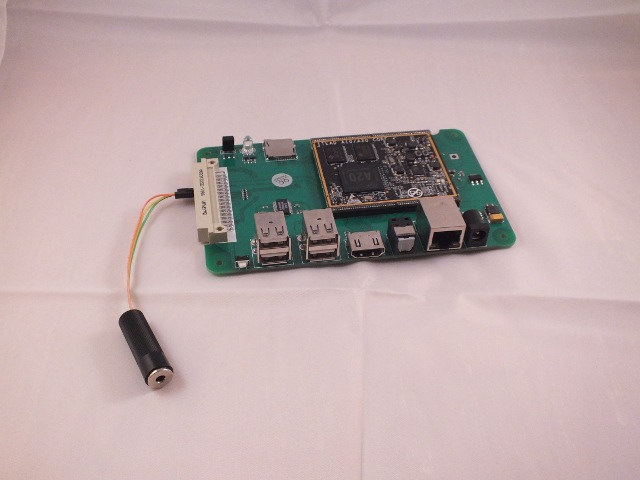
Here is what is inside the case:
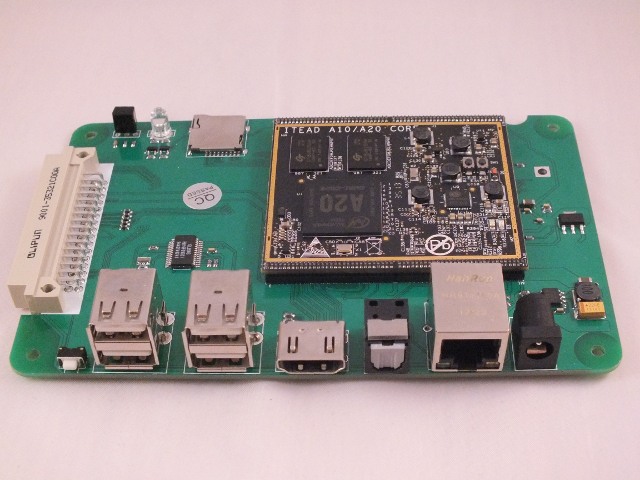
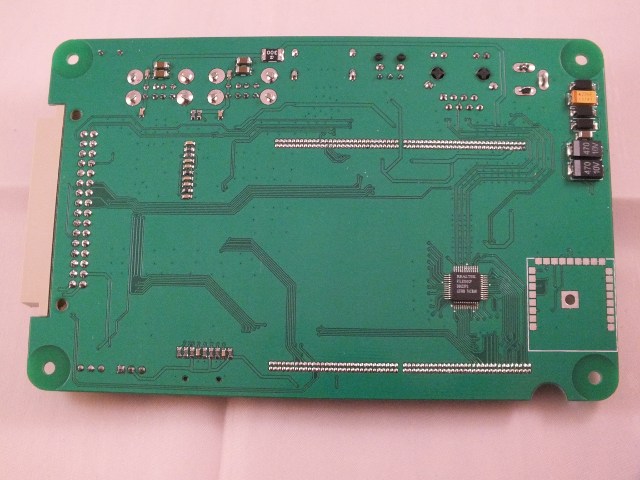
IBOX is designed to be hackable. IBOX can be opened easily (just open four screws). ITEAD Studio seem to have already done a relatively decent job by releasing some hardware files for the board: You can get the schematics and PCB layout for A20 CORE module, as well as the base board.
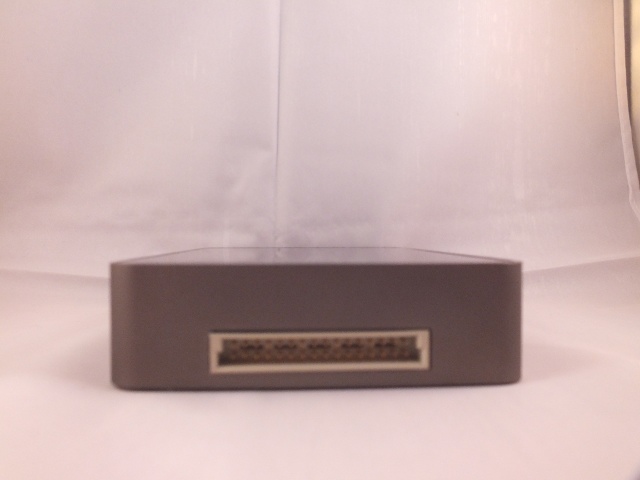
The 32-pin expansion connector has potential to use this box as many different kind of hardware hacks. It provides the most common interfaces in one connector: video output, serial interface (TTL level), debug interface, I2C, SPI, SATA interface, analog audio in and headphone out. The expansion connector is designed to accept 32-pin 9001 9001-38xx DIN 41612 Half Q Type Female Connector Socket, but for quick hacking you can use like two row standard pin header.
Review started with technical problems
When I received the IBOX I immediately tried to connect it to monitor and power the device. It had Android installed to it, everything should work nicely. The power supply had USA style mains connector and was designed to accept 110-240V 50/60Hz mains.First I tried to power the power supply with Europe-USA adaptation transformer that I had (safety isolation transformer that converts 230V to 110V AC with USA style outlet).The IBOX did not start at all. I tried with just mains outlet adapter that allowed 230V to go to power supply directly. Still nothing. There was no LEDs glowing in power supply or IBOX. And no picture. ![]()
I moved the power supply to my electronics laboratory to make analysis what is wrong with it. Measurement with multimeter proved that there was no voltage on power supply output which should deliver 9V 2A to the IBOX. After some debugging it turned out that the power supply that came with it was dead-on-arrival: it gave no output voltage no matter what I put in the mains side (I tried both 230V AC and 120V ac). It seems that the power supply was dead.
I needed to get a new power supply to continue the review. I did not have a spare 9V 2A power supply. I tried with 9V 1A power supply but things did not work well with it. I was wondering if IBOX could accept other voltage than 9V safely, quick web search did not give answer to it. I e-mail to iTead Studio and got answer that IBOX is designed to work with 7-24V input voltage. Was easier to find a power supply, because I had several suitable 12V power supplies available.
I connected 12V power supply, but I only got brief flash of picture to monitor. What is wrong?

I tried another monitor and no picture at all. ![]() Testing with the other monitor revealed that the power seems to go out from the box, especially if it is moved a little bit.
Testing with the other monitor revealed that the power seems to go out from the box, especially if it is moved a little bit.
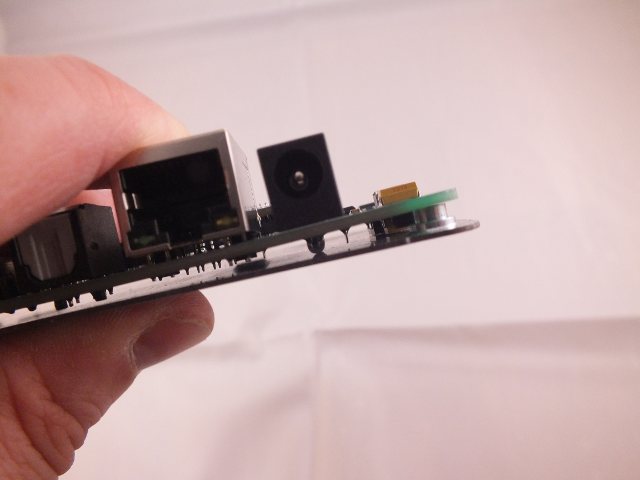
I opened the box. I found out that the power input connector pins could touch the case, thus can short circuit. This is what caused the power to be cut out and maybe even broke the original power supply. I contacted the manufacturer. They said that the power connector pins should have been bent before soldering, so they can’t touch the case. In my unit I had some manufacturing problem (improper installation that was not detected on quality check).
I continued testing without the case bottom. Worked better. I also found out that IBOX seemed to give now picture when connected to my home theater video projector.
Still operation was not reliable, power could be cut when I connected/disconnected USB device or moved USB cable. The problem turned to be on USB connector: The case prevented it from going in all the way… when it was not fully inserted it could cause some kind of short circuit that cut the power from the device. ![]()
When I removed the rest of the IBOX case I got the device working with my video projector.
So the power supply I received was dead-on-arrival and there was some serious electromechanical issues with the IBOX case. But the electronics inside worked well.
I continued testing without the case. I put the device for testing inside a small carton box so that I don’t accidentally damage it when it is sitting on my home theater sofa.
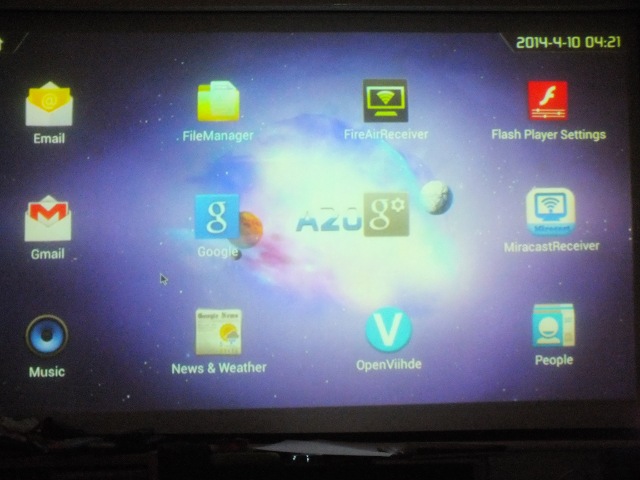
IBOX as multimedia player
I use Elisa Viihde IPTV service actively, so it was a good application to test how well IBOX can do this. I already use Raspeberry Pi to view recording from Elisa Viihde, so I have a good comparison how well IBOX performs on this task compared to Raspberry Pi.
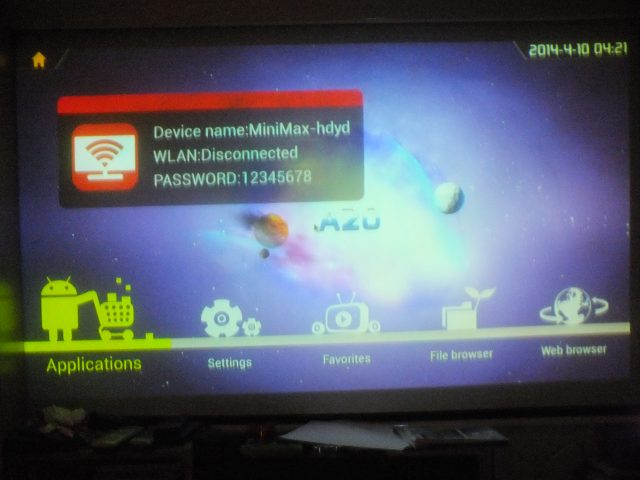
I needed to get first network connectivity. I decided to use wired Ethernet connection. To make it work I had to connect the Ethernet cable and enable Ethernet on the Android settings. After that it worked well. After that I could connect to Internet nicely and connect to Google Play shop to get apps.
Elisa Viihde has official Android app that I had already tested on smart phone and tablet. IBOX had Android in it, so getting it to work on IBOX should be in theory easy. I could not install Elisa Viihde Android app because Play shop told that this application is not not compatible with my hardware.
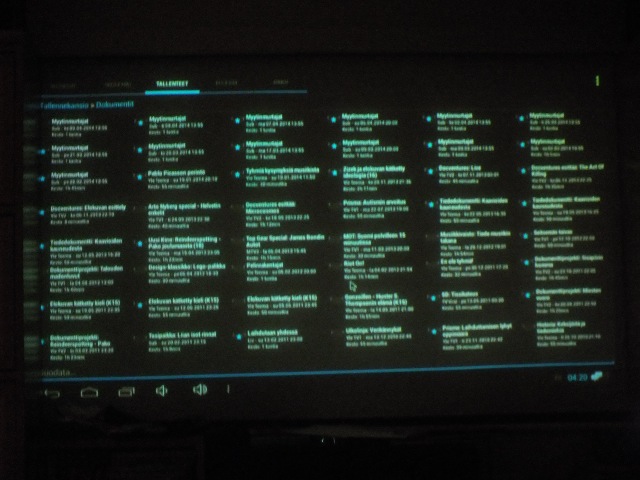
I knew there are also other applications for this as well. The next step was to install Elisa Viihde Open application. Elisa Viihde Open user interface worked for browsing the programs well, but it needed an external player to be installed to view the programs. I installed VLC for Android because I had used that application earlier successfully for the application. It worked for OK viewing, but fast forwarding did not work well (that’s more to blame on VLC Beta than IBOX I think). Elisa Viihde Open also offered another player TvdVideo as an alternative player. I tried it also. In my tests TvdVideo worked well even better than VLC (TvdVideo that supported better moving back and forth in the video stream).
When I compared to Raspberry Pi media player,the Android app I used had very different different different user interface compared to XBMC on Raspberry Pi. It took some time to get used to it, but not too long. What took some time was to learn how to get out of the video that was playing (that was done with right mouse button that acts like back button on Android). I saw some usability issues, some with Android default setting and some related to Elisa Viihde Open user interface. I operated the device with mouse, and it was not optimal for OS originally designed for touch operation: Mouse had a small dark cursor that did not show well on dark screen and dark virtual keyboard.
It took some work to get to figure out how to get the sound out: I could not use audio from HDMI and IBOX had Toslink/SPDIF output but I could not get anything from it to external DAC. Finally I figured out the right pins on the 32-pin extension connector that carry the audio signals, and I wired them to headphones (I connected pins 20=HPL, 22=HPR and 24=HPCOM according to pinout).
When I selected audio codec as the output on Android settings, I could hear the sound well on headphones. I did not try to connect the out to amplifier, because I found out that the audio common pin was at around 1.6V DC potential compared to IBOX ground (half-way between ground and electronics 3.3V). It might not be a good idea to try to connect it to an external amplifier directly in a setup where different components a grounded (for example a typical home theater setup with grounded video projector and everything wired to it).
IBOX felt quite much faster than Raspberry Pi with XBMC for this playback application. At the moment XBMC isn’t available yet through the Google Play Store, so I did not try it (would have needed quite a but of hacking to make everything to work).
I also measured the power consumption of IBOX when playing back IPTV. The device took around 200-300 mA of current from my 12V power supply (and around the same from 9V power supply).
I also quickly tested browsing web and reading my mail. They worked well as I expected from any Android device.
Conclusions
ITEAD Studio IBOX is still work in progress. The basic hardware on the circuit board seems to be OK, but the there are still several electro-mechanical details that needs to be fixed. With a little bit fine-tuning, the case would not stop the HDMI and Toslink connectors to plug nicely all the way it. Now the case gets on the way.
Also the manufacturing quality control should make sure that the power pins can’t touch the case and the connectors are nicely fit on the circuit board. I had problems in powering the device. The power supply was broken, there was short circuit inside the device (manufacturing error caused power connector pin to touch case).
The mechanical construction needs to be more precise. The case and HDMI connector configuration was so that at my unit the HDMI cabled (I tried several) did not go all the way to connector, causing unreliable operation (even power cut from device when connector was almost there and slight moved). The Ethernet connector was around 1 mm up from circuit board….
There was also issues in the compatibility with different displays… It could be only Android software issue.
I would have wanted to try other OS choices and hardware interfacing on this review, but due the problems on getting the thing to work on the first place, time-frame given for review and limited time available for testing, I had to skip those tests. Maybe I test those later.
If the device is aimed for European markets, the power supply should be changed. Besides the fact that the power supply I had was broken, it has also other issues. The power supply did have USA style power connector in it, and it will not directly plug to European power outlet. I took a look inside the power supply, and the the electronics in side the power supply have some potential safety issues: there is very small distance (around 1 mm) between the mains side and the output side. I expect the insulation distance in the circuit board to be several millimeters in properly built safe power supplies (this was supposed to be double insulated power supply).
With a little but of improvements this would become a very good product. At this point it feels like it is not completely ready product to be taken into wide use. Hopefully the issues get fixed in the next production batch.
5 Comments
Tomi Engdahl says:
First add-on and new OS version to IBOX seems to be coming:
” arduino add-on ” .
http://blog.iteadstudio.com/ibox-production-schedule-update-20140331/
1, arduino add-on has been finalized , the prototype board has been finished testing, and it will begin for mass production.
Features:
interface for arduino shield;
two Grove interfaces for electronic bricks;
SATA interface and 5V external power supply ;
On-board USB-TTL chip CP2102, can be identified as a serial port in the computer after connecting to a MicroUSB cable
2, Release IteadOS 2.0 alpha for ibox
On the basis of IteadOS1.0, we made the following updates:
Replaced fs of linaro with debian7.0 since linaro has many small bugs such as failing to shut down in graphical interface
Rewrote the entire SDK code to optimize GPIO rate, etc.
Newly added IteadOS for A20
Tomi Engdahl says:
IBOX Operating System Startup Location
http://blog.iteadstudio.com/ibox-operating-system-startup-location/
IBOX can run various versions of operating systems, including linux and android , etc.
Whether it is linux or Android, NAND FLASH version and the SD card version only differ in the installation position: one is installed in the NAND FLASH and another is installed in a Micro-SD card. System of SD card version cannot work in NAND FLASH, vice versa.
At present, IBOX boot sequence gives priority to SD card, if there is an SD card and a system that can run on the SD card , it will boot directly from the SD card. If there is no SD card or no operating system that can run on the SD card, the system will boot from NAND FLASH.
Tomi Engdahl says:
Banana Pi: The New Age of Single-Board Computers
http://www.eeweb.com/blog/rob_riemen/the-new-age-of-single-board-computers
Having a dual-core processor gives the Banana Pi twice the processing power of the original Raspberry Pi. The dual core gives the operating system the illusion that the computer has two 1GHz processors.
Tomi Engdahl says:
Another A20 based platform:
Tough Banana Pi: a Raspberry Pi for colour-blind diehards
Wi-Fi? Check. SATA 2 port? Check. Screen – Ow, my eyes!
http://www.theregister.co.uk/2014/11/28/banana_pi_review/
The Raspberry PI Model B+ is the hot new SBC (Single Board Computer) of the moment. The cheap price, low power usage, good support and ease of use make it a very good buy for DIY nerd projects and media front ends.
One common complaint is lack of RAM and CPU. Now, however, there are choices for Power users – the Banana PI from Le Maker, backed by the PRC’s Shenzhen University.
In terms of raw specifications, the Banana Pi blows the Raspberry Pi out of the water. This hot banana is one cool computer. The Banana Pi specs include:
Dual 1GHz ARM Cortex CPU
1GB SDRAM
10/100/1000 Ethernet (Realtek)
Wi-Fi B/G/N
SATA 2 Port
IR receiver
It has all the usual SD card slot and 2 USB slots, audio and such. Banana Pi also has more RAM and CPU (pretty much double the specs of the Raspberry Pi Model B+), but there are some other tasty treats that potentially make it really appealing to power users.
Tomi Engdahl says:
About my probems with HDMI connections.
I recently got a HDMI to VGA adapter that worked well with my IBOX.
I got my IBOX connected nicely to several PC monitors without problems.