I posted a quick note on interesting looking OBS Studio software some time ago. OBS (Open Broadcaster Software) is a free and open source software for video recording and live streaming. It works on Windows, Mac and Linux.
OBS could be described as some kind of combinaton of real time video mixing and video encoding/streaming system. OBS offers high performance real time video/audio capturing and mixing, meaning you can take video input from various sources (like built-in video camera on your laptop, other video devices, video playback, computer application window contents in real time, etc..) and combine them to outout you want. You can easily combine one or more video sources to a “scene”, and switch easily between scenes. The software has also audio mixer. Professionally made news broadcasts, live webcasts, and live TV events usually use multiple-camera setups controlled by one central software suite – with OBS you can do the same yourself.
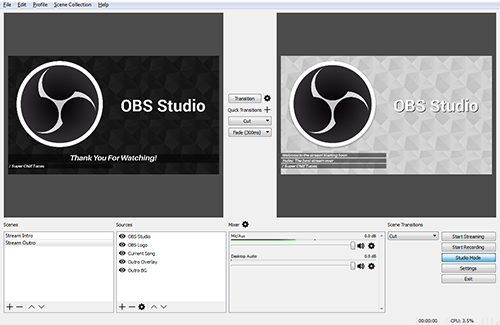
Linux video editing in real time with OBS Studio article described OBS as software for on-the-fly video editing and basic compositing. But here“Editing” is a bit of misnomer here. OBS really isn’t an editor. In broadcast terms, it’s a bit closer to being what’s called a live switcher or video mixer. When doing a broadcast of a live event as it occurs, you can change which video source(s) get routed to your video output on the fly. If you record the video coming from the output, you have a finished video that doesn’t require offline editing since all of the cuts happened live. Been there and done that – I have worked with live TV broadcasting (at those times with professional and some ow my own DIY gear). The software has even a Studio Mode that lets you preview your scenes and sources before pushing them live.
You might have seen results of OBS prodction for example on those YouTube gaming videos where the player video view is mixed to one corner of video – many of them are done or could be done with OBS. OBS supports streaming all your favorite streaming platforms like YouTube, twitch, etc.. Or you can save the gameplay to a local video file that you upload to service of your choice.
At quick testing this software looks very promising. I got it working well on my laptop that runs Windows 10 (I neeeded to install Visual C++ Redistributable Packages for Visual Studio 2013 to make the software to work). I got easily many video sources working – I tested built-in camera on laptop, USB webcam, USB endoscope, USB microscope, USB video capture adapter, application Windows contents on the same PC, etc.. After viewing some introduction videos getting everything working was pretty easy.
Here are some videos on feature and using OBS:
OBS Studio BEST Streaming & Recording Settings 2016
Full Basic Setup Guide for OBS (Open Broadcaster) 2017 | Beginner Tutorial
OBS Studio BEST Settings for Recording and Streaming (Tutorial)
34 Comments
Tomi Engdahl says:
OBS: How to Chroma Key Correctly!
https://www.youtube.com/watch?v=0l9h3oog3-o
A quick overview of how to setup your chromakey in OBS.
OBS CHROMA KEY SETTINGS AND GREEN SCREEN FOR GAMING 2016
https://www.youtube.com/watch?v=33HXwK8MIfI
This is a tut on how to make your background transparent in OBS!
Tomi Engdahl says:
How to Chroma Key With OBS
https://www.youtube.com/watch?v=1aJaUuP7M8U
How to use Chrmoa key/ Color Chooser in OBS
Tomi Engdahl says:
5 MINUTE EASY SETUP! [Green Screen w/ OBS Classic] “Chroma Key”
https://www.youtube.com/watch?v=MhInoTabXis
Tomi Engdahl says:
Question / Help How to setup Chromakey
https://obsproject.com/forum/threads/how-to-setup-chromakey.10085/
1. Add a camera to Global Sources.
2. Add that camera (from the new ‘global sources’ option in the right-click menu on the Sources list) to a scene.
3. Preview the scene. You should see your camera’s video.
4. Right-click on the global source in the list, select ‘properties’.
5. Check the ‘Use Chroma Key’ box. Click the ‘Select’ button. Move your mouse to your preview window, and use the now-eyedropper to select an example color (you want to hit the middle of your color-range, so not a shadow and not a highlight).
6. Fiddle with the Similarity values, and the Blend until you get a good, clean chromakey. Add spill reduction only if part of the edges of you are being chroma’d out (spill).
I use a Similarity of 80 and a Blend of 60 on my own screen; it’s really a question of how good a greenscreen you have, and if you’ve lit it properly.
Also, If you have any sort of good webcam, say a logitech C920, and you have the crossbar installed, make sure to turn off “right light” or any other automatic lighting thing’s. It will mess around with your lighting automatically, and will mess up the green screen.
I’d have to second that; switch off all the auto-stuff. Turning off auto white-balance, auto-gain, auto-brightness, etc is VERY important to getting a consistent chromakey, as the camera won’t be messing around with the color settings then (as they’re all set to manual).
I do turn off auto-focus, mostly as I don’t generally move enough to require it to re-focus, and don’t want it deciding at-random to change focus and go all blurry (as the c920 has a tendency to do).
Lighting is waaaaaay more important than buying fancy screens. Consistent, bright lighting is the #1 key to chromakey behaving properly for the usage you intend.
I’d strongly recommend a diffuser setup for lighting your greenscreen if you have the space available; the soft light will help reduce any shadows/highlights and produce a consistent tone. Be aware that most good diffuser heads are… pretty large though. By necessity.
Tomi Engdahl says:
https://streamshark.io/blog/chroma-key-software-live-streaming/
These days most live streaming software packages include chroma keying as a feature. In this guide we’ll show you how to achieve this great effect with OBS (Open Broadcaster Software).
Equipment needed:Green Screen Setup
A solid green background
A webcam or video camera
Lighting
OBS
As with all things in video production, you can easily spend a fortune on equipment. For the purpose of this guide, we’ve tried to keep things reasonably cheap.
Lighting is very important when it comes to green screens as you want the green to be as even as possible.
I won’t delve too deep into the best lighting setup, but for professional shoots it’s recommended to have three types of lighting. Back lights, key lights and fill lights.
If you’ve correctly set-up the green screen and lighting, the chroma keying should be reasonably simple.
Open up OBS and add your video source.
Right click on the video source and select ‘Filter’.
Click the ‘+’ under the ‘Effects Filters’ section, then select ‘Chroma Key’.
Enter a name for the effect layer.
When adding a chroma key OBS will automatically generate some baseline settings. In most cases you’ll need to fine tune these settings. I’d recommend experimenting with the sliders to see what they do.
Once you’re happy with the chroma key settings you should then do a quick run through of your shoot. If the subject is going to remain stationary, you’re likely good to go. However, if there’s going to be movement, you should double check every position the subject will be in to make sure the chroma key settings are correct for the whole shoot.
After you’ve confirmed the chroma key settings are correct, you can now add your background layer(s). You will need to make sure they’re below the chroma keyed camera layer in OBS.
Live chroma keying can be quite CPU intensive, so make sure your computer is powerful enough.
Make sure the subject doesn’t have any green, or reflective material on them. Often blonde hair can cause issues with reflection.
In OBS you can chroma key images, and videos – not just camera feeds.
If you have multiple shades of green, you can chroma key a source multiple times, each time specifying a different shade of green.
go to source list select camera and then click with right mouse button select filter and ….. now you see filter, select it and appear the chroma key effect.
You can add a background image by adding a new ‘source’ (click the + below sources), then selecting ‘image’. Make sure the that the image layer is below the chroma keyed layer.
Tomi Engdahl says:
Filters in OBS Studio
https://nerdordie.com/tutorials/filters-obs-studio/
Adding Effect Filters in OBS Studio
The thing you need to realize about filters, is that they can be added to every source individually. However, if you apply filters to a source in one scene, they will carry over to any other scenes that your sources are used in. This means that if you want to have different filters applied to the same source, you’d have to add that type of source in again, and then name it something different, such as image 2.
To use a filter, let’s first click the source we want to apply it to, right click, and select Filters. If our source allows Audio/Video Filters, there will be a section for them at the top-left. But again, let’s look at the Effects Filters on the bottom-left. We can see our current selected source on the right. Now, we can hit the plus, to add a filter. Let’s work our way from the top down.
We’re going to notice that adding filters is pretty similar to adding new sources into OBS. For Image Mask/Blend we just select it, name the filter, and hit okay. You’ll see that filters have the ability to be toggled on and off, just like sources as well. Image Mask/Blend might seem complicated as a new streamer, but let’s take it slow and hopefully you’ll understand what uses you can have with it.
Let’s apply some filters to my another source like a background video. After I open up the filters panel, I’ll add a color correction filter. The first thing we’ll notice is color. This will basically tint the source to the color we select.
The scroll filter can actually be used in some interesting ways. First, it’s very useful to make text sources move from left to right.
Color Key Vs Chroma Key
Let’s go ahead and move on to our next filter, the Color Key, but let’s actually talk about Chroma Key as well.
What’s the difference between color and chroma key?
Well, I’m going to make it quite simple for you. If you want to filter out or hide a green screen, use the Chroma Key. Chroma key is what more streamers will want to use. A color key can be useful with graphics with a specific color you’d like removed.
Let’s work with the chroma key filter. We can work from the preset colors under Key Color Type, or we can pick a color of our own. Fo green screens, this is generally the best idea, to select the closest color to your screen possible. So, with Custom Color selected, let’s hit select color. Here, we can select colors in various ways, or we can actually use Pick Screen Color to pull up a sort of eye dropper that will match the color we’re hovering over. Go to your source and select the most common color shade you see in it, that you’d like to key out. Simply click it and you’ll have the color you need. You can hit Add to custom colors, to save this color selection, and then Okay. If you’re using a green screen, you might already see some good results, if not, don’t worry, we can do some tweaking to the options.
Finally, for graphical sources, let’s move on to possible the easiest filter, sharpen. If you have a blurry image, webcam, or similar, just simply increase the sharpness to a desired effect. Be careful with sharpness, it can make things look a bit unnatural if you use too much.
Video Delay (Async)
Next, is Video Delay (Async). This will basically tell a specific source to be delayed a certain amount of time in milliseconds.
The last filter is Noise Gate. You may be already familiar with these options, but let’s take a look. If you have a source that you’d like to automatically filter out some loud noises, or only play noises that are above a certain level, then you want to set up a noise gate filter.
Tomi Engdahl says:
TESTED:
Chroma key works nicely!
Also color key works, but I seem to get better results with chroma key.
Tomi Engdahl says:
How to livestream games like the pros with OBS
https://opensource.com/article/17/7/obs-studio-pro-level-streaming?sc_cid=7016000000127ECAAY
The tool used by many of Twitch’s most popular streamers is completely free and open source.
OBS Studio is one of the most popular tools for streaming to Twitch.tv. At any given time, nearly 1-million people are watching live, and thousands are streaming. Most users stream video games.
OBS Studio is developed by a small team working in the open. Most of the code has been written by jp9000/Jim, but several other developers also have made serious contributions to the project.
Omgvandi says that most OBS Studio scenes are constructed from a few basic sources:
Webcam video source: “Some people have a green screen. Most have the straight camera box, and the best have a real-life background that fits the style of the stream,” she says.
Game capture: OBS Studio can capture full-screen games, windowed games, or the raw desktop.
A browser source that displays new followers, new donations, and subscriptions. Browser sources are dynamic web content rendered onto the stream.
Static or animated graphics to provide borders and branding
OBS Studio has a huge and engaged user base, especially when you consider the size of its development team—one main developer and a few volunteers, none of whom are paid for their work. Its official Twitter account has more than 95,000 followers.
Wrapping up
OBS Studio is technically solid, and what users can do with it is flat-out impressive.
Tomi Engdahl says:
OBS Studio 116 – Audio Mixers vs. USB Interfaces – Which should you use? Is there a difference?
https://www.youtube.com/watch?v=45pf0VoEwc4
Tomi Engdahl says:
Video production tutorial: Green-screen lights and materials | lynda.com
https://www.youtube.com/watch?v=wD5Z822aT5U
Lighting a green-screen scene correctly is an important task in the green-screen workflow. Learn how to set up green-screen lights and materials in this tutorial.
Tomi Engdahl says:
Another alternative open source video mixer software for Linux:
An Open Source Video Mixer, Inspired by DIY Space Exploration
http://cdm.link/2012/10/an-open-source-video-mixer-inspired-by-diy-space-exploration/
And, of course, this could be useful I expect for visualists, even if you’re not trying to launch a rocket.
Unlimited number of video feeds, geometries and frame rate.
Command language for scripting text overlays.
Video scaling of regular feeds limited to 1:1, 1:2, 1:3, 1:4, 1:5, 2:3, 2:5 and 3:5.
Handling of PAR (Pixel Aspect Ratio) for regular feeds.
Unlimited number of virtual feeds (unlimited number of copies from regular feeds).
For virtual feeds unlimited vector based up and down scaling of both height and width independently.
For virtual feeds unlimited vector based rotation of video images.
For virtual feeds unlimited vector based alpha blending of video images.
Unlimited overlay of external PNG based images with or without transparency.
Unlimited number of vector based (font based) texts in any color on top or underneath video.
Unlimited vector based rotation and alpha blending of text.
Support for solid and shaded (transparent) background for text.
Support for changed shading of background under text also known as individual linear pattern shading.
Snowmix
Video mixer for mixing live and recorded video and audio feeds
https://sourceforge.net/projects/snowmix/
Snowmix is a Swiss army knife tool for mixing live and recorded video and audio feeds. It supports 2D and 3D clipping, scaling and transparent overlay of video, png graphics and text. It supports animation of video, images and texts through native commands changing scale, placement, transparency and rotation. Animation and actions can also be controlled through native scripting and an embedded Tcl interpreter. Snowmix is designed for control over low bandwidth links and can work as a standalone CLI based program. Control over both CLI and a TCP connections.
Input and outputs can be done through GStreamer pipelines or the GStreamer shmsrc/shmsink API.
OS X on Intel and Linux on amd64/i386/i686/ARMv7 and FreeBSD on amd64 supported. Ubuntu/Fedora/Mint/Debian/Chakra/CentOS/OpenSUSE and Linero is supported.
Tomi Engdahl says:
OBS Studio vision mixer
https://www.youtube.com/watch?v=p1I3gbGPGEA
https://github.com/Palakis/obs-websocket/releases/tag/4.0.0
Tomi Engdahl says:
OBS Studio 110 – MIXER MASTER – How to use OBS Mixer for Multiple Audio Tracks & Balanced Audio
https://www.youtube.com/watch?v=nd739DyqSV4
Tomi Engdahl says:
Multi-Camera Live Stream on a Computer with OBS
https://www.youtube.com/watch?v=8UtXvJq-l5M
In this video I describe a method for live streaming with multiple cameras without having to use a physical video switcher. OBS does a lot more then just streaming, it can also switch between multiple video interfaces.
Tomi Engdahl says:
Best OBS Streaming Settings 2018!
OBS Studio Beginners & Advance Guide Twitch YouTube Gaming Mixer
https://www.youtube.com/watch?v=FQysZTypZWE
Tomi Engdahl says:
OBS-VirtualCam 2.0.4
https://obsproject.com/forum/resources/obs-virtualcam.539/
Supported Bit Versions
32-bit, 64-bit
Source Code URL
https://github.com/CatxFish/obs-virtual-cam
Minimum OBS Studio Version
24.0.0
Supported Platforms
Windows
This plugin provides a directshow Output as a virtual webcam .
How to use:
Output:
1. Selecting Tools -> VirtualCam
2. Press start button and close diailog
3. Open your 3rd party program and choose “OBS-Camera” as a Video input
Filter:
1.Add a filter to the source you want to output to the camera
2.Choose a sink camera target then press start button
3.If this camera is not occupied , the start button will change to stop button .
4.Open your 3rd party program and choose “OBS-Camera” as a Video input.
Tomi Engdahl says:
https://techcommunity.microsoft.com/t5/microsoft-teams/anyone-know-if-i-could-use-green-screen-background-video-in-a/td-p/800852
Tomi Engdahl says:
https://www.starwars.com/news/star-wars-backgrounds
Tomi Engdahl says:
Live coding on stream as a way of sharing your projects in a more relatable, immediate way than a polished blog post, teaching others about programming, or just as a way to have fun. Live coding and streams in general are an interesting possible future form of both education and entertainment.
https://jordanlewis.org/posts/twitch-live-coding/
Tomi Engdahl says:
Built for the Raspberry Pi Zero W and Pimoroni Unicorn pHAT, TallyPi connects to the lights and controls them over HTTP.
DeckerEgo’s TallyPi Is a Network-Controlled Tally Light for Live Cameras
https://www.hackster.io/news/deckerego-s-tallypi-is-a-network-controlled-tally-light-for-live-cameras-b859d074602e
Built for the Raspberry Pi Zero W and Pimoroni Unicorn pHAT, TallyPi connects to the lights and controls them over HTTP.
https://hackaday.io/project/175088-tallypi
Build network controlled tally lights for live cameras, intended for control by OBS but extensible enough to use for whatever you like.
Tomi Engdahl says:
This DIY Arduino Touchscreen Controller Is Perfect for Your OBS Studio Software
Aaron Peterson’s obscene_deck is an affordable controller for streamers who use OBS Studio for their streams.
https://www.hackster.io/news/this-diy-arduino-touchscreen-controller-is-perfect-for-your-obs-studio-software-d786c281a632
Tomi Engdahl says:
How to Use Hypno With OBS
https://www.youtube.com/watch?v=4zX9Nx4yTdU
Quick description of how to use Hypno with OBS!
Follow instructions in below links!
OBS: https://obsproject.com/
OBS NDI Integration: https://github.com/Palakis/obs-ndi/releases
Tomi Engdahl says:
NDI stands for Network Device Interface, and it’s the protocol developed by NewTek for broadcasting high quality video and audio over an internal gigabit network. Use software like OBS and receive video and audio from other computers to record or stream. … Install it on your mobile phone and use them as extra cameras.
https://pixelvalleystudio.com/pmf-articles/ndi-obs-and-zoom
https://github.com/Palakis/obs-ndi
Tomi Engdahl says:
Does NDI work over WiFi? NDI will work over a wireless network but at a reduced frame rate depending on the bandwidth available. As a general rule of thumb 100Mbit is recommended per 1080p video feed.
https://www.vmix.com/ndi/
Tomi Engdahl says:
You can use OBS Studio on a computer to capture a game and other sources and send this out as an NDI stream with the OBS Studio NDI Plugin by Palakis.
https://streamlabs.com/content-hub/post/create-ndi-stream-output-with-obs-studio
Tomi Engdahl says:
How do I use Ndi with OBS?
First of all make sure you have OBS Studio installed.
…
First we have to configure the Camera for OBS Studio app to broadcast via the NewTek NDI source.
Open the app’s preferences.
Select the output tab.
Select NewTek NDI output.
Tap done.
To confirm, the status label will update to the NDI status.
Getting Started with NewTek NDI
https://obs.camera/docs/getting-started/ndi-wifi/
Let’s setup OBS Studio with the third party NewTek NDI plugin so we can receive the wireless video & audio signal from our iOS devices.
Tomi Engdahl says:
How much bandwidth does NDI use?
A single 1920×1080@30 fps NDI stream needs at least 125 Mbps of dedicated bandwidth. A single 1920×1080@30 fps NDI|HX stream needs from 8 to 20 Mbps of dedicated bandwidth.
NDI® and NDI|HX for network video production
https://www.epiphan.com/blog/ndi-ndihx-network-video-production/
Wondering what low-latency NDI® video over Gibabit Ethernet can do for your live video production?
NDI® from NewTek lets you transmit and receive broadcast-quality video with very low latency over Gigabit Ethernet networks. With NDI, video and audio can be transmitted farther over existing LANs using cost-effective CAT5/6 cables and the quality is virtually lossless.
NDI gives you flexibility to choose from a wider variety of video input sources. You can access multiple cameras, software on computers, mobile devices, and more on the network using a single LAN port. No expensive multiple-port HDMI switches or SDI routers are needed.
The number of NDI sources you can add to your network is practically limitless.
More and more software applications like Skype, NewBlueFX, EasyWorship and others offer native NDI support.
To help spur adoption, NewTek provides free NDI plugins for popular applications like VLC and Adobe Creative Cloud. For all the rest, NewTek offers simple-to-install free NDI tools. For example, NDI Scan Converter lets you turn a computer into multiple NDI inputs that any other NDI device on the network can access.
Another useful free tool is NewTek’s NDI Virtual Input application. This tool makes an NDI source appear like a standard Microsoft® Windows webcam that can be used as a video input for software like Google Hangouts, Zoom, and many others. This way, NDI lets you avoid the cost of purchasing an expensive video capture card for every video source you want to bring in to your computer. All your video inputs are readily available from the LAN port.
A couple more options include the free NewTek Connect and the NewTek NDI Camera app (available for a nominal fee). NewTek Connect makes any camera or device connected to a computer’s capture card (or the local webcam) available to other NDI systems on the LAN. And NewTek NDI Camera converts the output from iOS devices and Android phones into NDI video inputs. If you want to take your content further and out onto the WAN, consider using SIENNA Cloud for NDI.
Adoption of NDI is spreading like a big net (pun intended) since NDI introduction to the public early in 2016. Designing NDI into your AV system is getting easier as more hardware and software options become available. There are also more NDI enabled cameras to choose from companies like PTZOptics, or Panasonic, as well as full-featured video production systems like the Epiphan Pearl-2 that support NDI.
Graphic overlays with alpha channel
With NDI, you don’t need to use the HDMI ports on your production gear to connect an effects computer. All your video sources including your computer generated effects connect through the LAN port. This also lets you offload chroma keying from your production equipment for better performance so you can worry less about chroma effects.
Wrap it up!
NDI opens up new opportunities to make your live video production workflow easier and more flexible. You can save money on cables and infrastructure by using the existing Ethernet network and gain easy access to a lot more video sources at broadcast quality. There are free plugins and tools from NewTek to help you start incorporating NDI into your current AV system right away.
Tomi Engdahl says:
HOW TO STREAM WITH TWO PCS USING OBS STUDIO AND THE NDI PLUGIN
https://www.obs.live/articles/2019/5/1/how-to-stream-with-two-pcs-using-obs-studio-and-the-ndi-plugin
A popular streaming setup involves two computers. The major benefit of this is that it allows the second computer to bear the brunt of the encoding load. Streaming at the highest quality, using the CPU intensive x264 encoder, can be a huge impact on a system, causing the framerates of your games to suffer and making the whole experience unenjoyable for both viewer and streamer.
Another benefit is that if your main gaming PC has a problem and you need to restart it, or restart OBS because the stream is actually coming from the second computer, your stream will not go offline.
The traditional method of a two PC streaming setup involves using something known as a capture card, like an Elgato HD60S. These cost almost $200 though and thus have a slight barrier to entry.
A FREE WAY TO STREAM WITH TWO PCS
Not everyone wants to pay for something like a capture card, especially if you’re just starting out streaming.
Fortunately, a plugin utilizing something called NDI from a company called Newtek has been developed for OBS Studio. This uses your available network bandwidth (not your Internet speed) between your computers and your router to send/receive anything in your OBS preview window.
Since the main PC isn’t actually streaming, this NDI protocol is very lightweight on the gaming system and so the majority of your performance is maintained, while the second PC does all the heavy lifting. All the traffic is passed through your local area network, or LAN also known as your Home Network.
Since the second PC will be a dedicated streaming machine, you don’t actually need some super crazy high-end and powerful system in order to stream at a decent quality. Most old computers can work well as secondary computers, so long as they fit the below requirements.
The CPU must support Supplemental SSE3 instruction set (SSSE3). Please note, that’s THREE S’, not two. Google your CPU model + “cpuworld” to get a result that will tell you if your CPU supports that instruction set. AMD CPUs before the FX/Bulldozer series did not support SSSE3.
OBS Studio and the NDI plugin
Quad-core or hyperthreading dual core for 720p at 30 frames per second
Hyperthreading Quad-core or better for 720p 60 frames per second (preferred), or 1080p at 30 frames per second/1080p at 60 frames per second
Gigabit (1000 megabit) network connections between computers and router/switch. You can verify this on each computer by going to the control panel in Windows > Network Connections > Selecting and opening your active ethernet connection
HOW TO INSTALL THE OBS NDI PLUGIN
Step 1: If you don’t already have OBS Studio, go to https://obsproject.com/ and download and install the appropriate version. Reboot your computer after installation (this is optional but good practice to ensure the NDI plugin installs correctly). Make sure OBS is not open before proceeding to the next step. This guide is for Windows, so be aware of that.
Step 2: Download and install the OBS NDI plugin using the windows installer package. https://obsproject.com/forum/resources/obs-ndi-newtek-ndi%E2%84%A2-integration-into-obs-studio.528/
Once installed, follow the prompt to reboot your computer.
Step 3: Repeat these steps for the second computer
Step 4: Verify that the NDI installation was successful by opening OBS and clicking “tools.” Make sure to click “allow” on any prompts at this point when opening OBS. If you see “NDI Output Settings” then we are ready to proceed to configuration.
CONFIGURING OBS FOR TWO PC STREAMING
The simplest way to take advantage of OBS NDI and a two PC streaming setup like this is to essentially mimic a single PC streaming setup. Configure all of your overlays and alerts in OBS on the computer you will be gaming on. For a step by step tutorial on configuring StreamElements overlays and alerts in OBS, please see the following videos:
https://www.youtube.com/watch?v=IFgrV2aSiHg&t=
https://www.youtube.com/watch?v=LwAfMIR3Cj0&list=PLCDDKlFdScbEwdx5AntcQIS1InkFJwHtv&index=5&t=0s
If you’re at this point, we will assume that you have your overlays and alerts configured so lets go over getting OBS ready for two PC streaming.
ON THE GAMING PC
Step 1: Open OBS and go to settings > video. Ensure your video output settings here reflect the quality you want to stream at. The lowest impact, highest quality setting will be 720p at 60fps so that is what is shown.
Step 2:
Now go to Tools > “NDI Output Settings” and click it. You will be presented with a window that lets you name your source and checkbox as an output. The checkbox we will check is “Main Output.” Make sure you write a name that will reflect which PC you are using.
Pressing OK will activate the NDI signal to be sent from the Gaming PC, so the gaming PC configuration is now complete*. Let’s move on to the second PC.
*Note: activating the NDI output will make you unable to change your video settings. In order to change your video settings if you need to change resolution or FPS, you will need to deactivate NDI then change the video settings, then reactivate NDI. The second computer will automatically pick it back up.
SECOND PC CONFIGURATION
Step 1: Open OBS on the second PC
Step 2: Go to Settings and configure your stream output settings, including your stream key (or “connect account” option for Twitch and Youtube) and set your bitrate. A good example configuration for your Output is pictured below. Adjust the bitrate as necessary for your upload speed and adjust your CPU Usage Preset based on how powerful your CPU is/how much CPU load OBS uses while streaming with this second PC.
Step 3: Configure your Video settings to match the “Output (scaled) resolution” listed Step 1 above for configuring the Gaming PC.
Step 4: Almost there. Now we just add the Gaming PC’s NDI signal to the second PC. To do that, go into sources and click the + sign or right click. You should see “NDI Source” on the list, click it.
Step 5: Once you click it, you’ll be asked to create new or add existing. Create new, and give it a familiar name such as “Gaming PC.” Click “OK.”
Step 6: Now you’ll be presented with a window that should show you a dropdown list of any NDI signals that second PC you’re on detects**. It should show “Gaming PC” along with its configured network name. You may have manually configured this network name, but it may just be random letters and numbers with the familiar name you configured above in parentheses next to it.
Note**: You may see “latency mode” when at this screen and it has two options, Normal (safe) and Low (experimental). Try to use Low for the smoothest stream experience, but if you encounter any issues then leave it Normal.
Press “OK” and your OBS feed from the gaming PC should appear in your preview window of your Second PC. You are now ready to stream!
Once you are here and ready to stream, you can press “Start Streaming” in OBS on the second PC. You must NOT press that button in OBS on the gaming PC, but you MUST leave OBS open on BOTH computers.
Should you encounter any issues, fear not as there is a FAQ video that should help address most commonly asked questions about OBS NDI.
https://www.youtube.com/watch?v=N3KlbU5AYP0&t=
Tomi Engdahl says:
Standalone zip: https://obsproject.com/download
Portable App: https://portableapps.com/apps/music_video/obs-studio-portable
Tomi Engdahl says:
https://www.facebook.com/groups/ndiusers/permalink/889619978336712/
We have been using a free, very capable toy for streaming all this time. I better tell the higher-ups.
We use both everyday, it just depends on your use case. vMix is primarily our main switcher, because of audio management, aux outputs, etc. OBS is our main remote presenter streaming tool, and allows the hosts to have multiple cameras without using all their upstream bandwidth. Both are critical to our workflow.
Tomi Engdahl says:
OBS Studio on Raspberry Pi 4
https://forums.raspberrypi.com/viewtopic.php?t=266331
https://obsproject.com/forum/threads/obs-raspberry-pi-build-instructions.115739/
Tomi Engdahl says:
vMix Vs. OBS: Which is Better for Live Streaming?
https://www.zype.com/blog/vmix-vs.-obs-which-is-better-for-live-streaming
vMix vs. OBS Studio: An Overview
Both OBS Studio and vMix are powerful packages that allow a range of livestreaming features, but there are a few key differences.
Price
The obvious difference between vMix and OBS is price. OBS is an open-source package and is completely free. vMix, on the other hand, is a paid package. The cost ranges from $60 for the most basic version to $1200 for vMix Pro, or $50 if you opt for the subscription model, referred to as vMix Max.
Sources
Both packages support a number of sources like webcams, video and audio files, sound cards, images, and desktop windows. vMix, however, allows more types of sources such as network device interface and a feature called vMix call, which allows easy integration of remote guests to your stream.
Titles and Animations
Both vMix and OBS can handle text, but vMix has a built-in titling tool, and OBS does not. Animations are possible with vMix but take a little programming knowledge. OBS lets you add a text file as a source – workable but not as dynamic as vMix’s built-in tool.
vMix vs. OBS: The Bottom Line
The bottom line is both vMix and OBS are powerful platforms. If your budget is low, OBS is the obvious choice, as it is if you’re a Mac or Linux user. However, vMix comes with a more robust feature set, especially if you opt for the higher-priced versions. If you’re a beginner, OBS may be more intuitive since it lacks more advanced features.
Either way, you won’t regret trying either package.
Tomi Engdahl says:
Backgrounds, Backdrops, Green Screen, Projections, Sets and More
https://www.youtube.com/watch?v=I8LHDonGuWg
Interesting Video backgrounds can be created many different ways including green screen, blue screen chroma key, wall projection, rear projection, front projection, digitally printed or painted backdrops, fake sets, props and real backgrounds and locations. Even ugly boring locations can be made interesting.
Tomi Engdahl says:
https://hackaday.com/2023/08/23/diy-pan-and-tilt-camera-mount/
3D Print DIY PTZ PAN TILT HEAD DB3-VISCA (with Support for OBS & VMix)
https://www.instructables.com/PTZ-PAN-TILT-HEAD-DB3-DB3-VISCA/