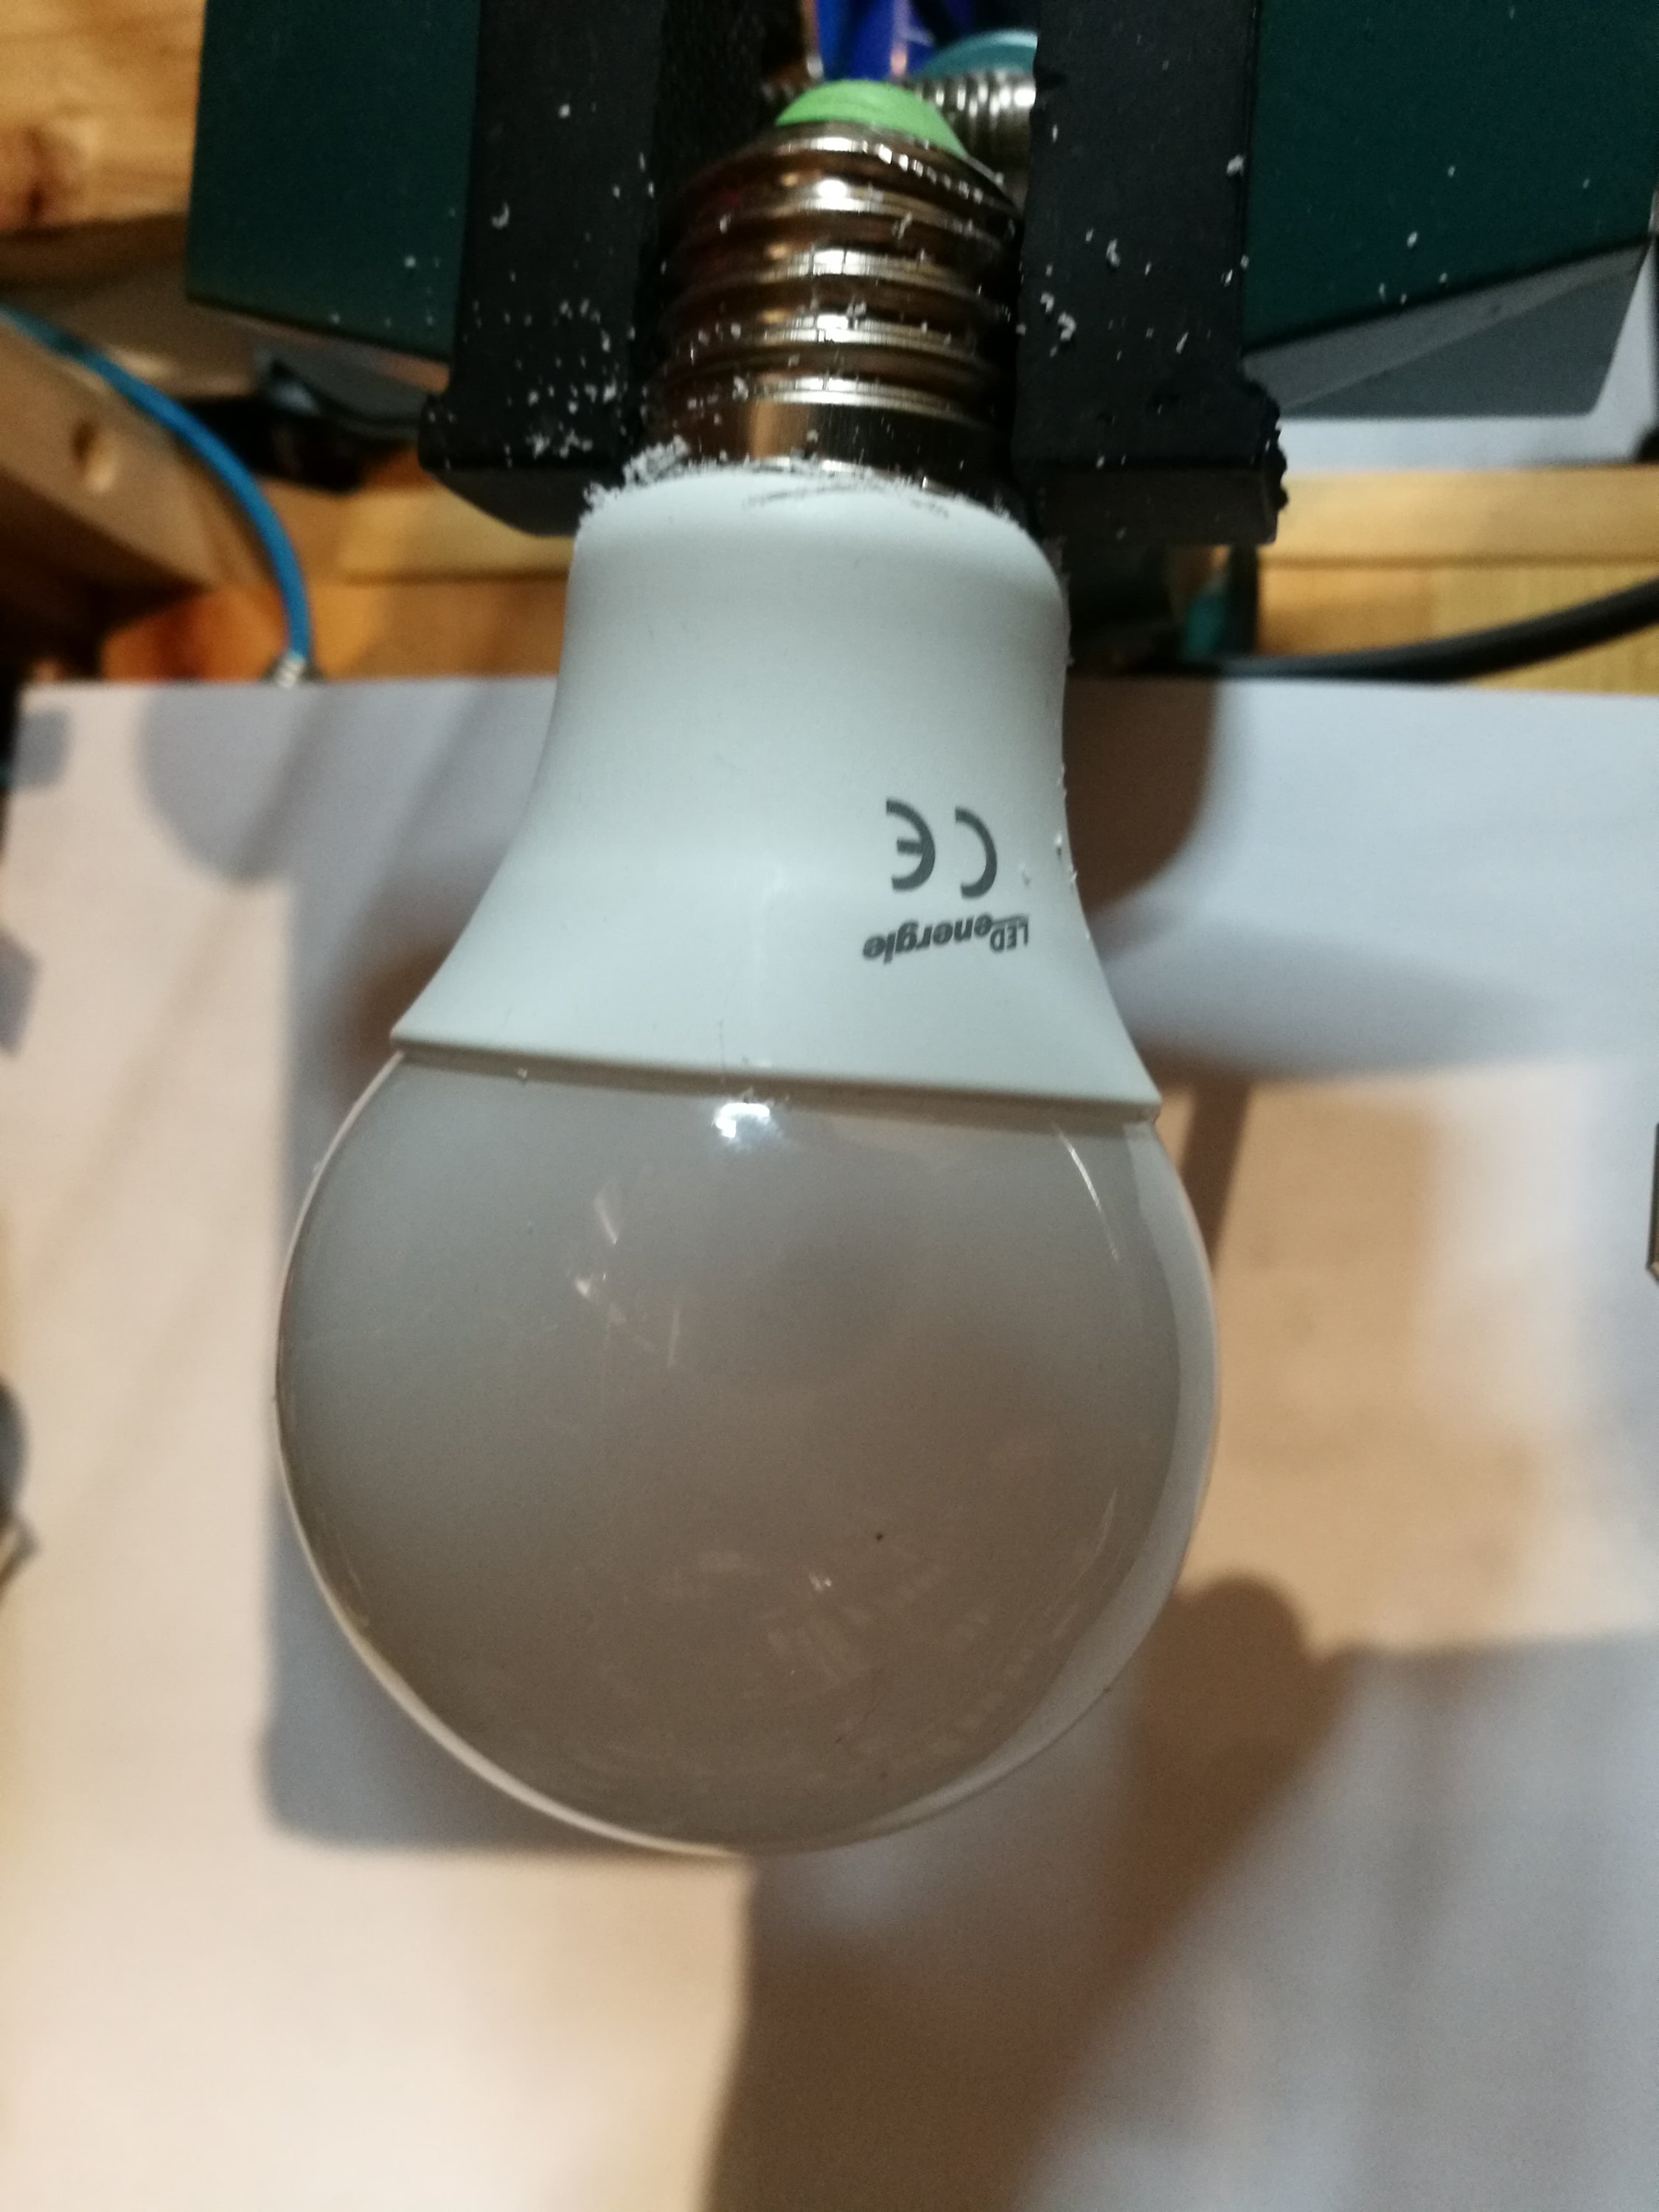
LED Energie brand LED bulb with following data stopped to work properly:
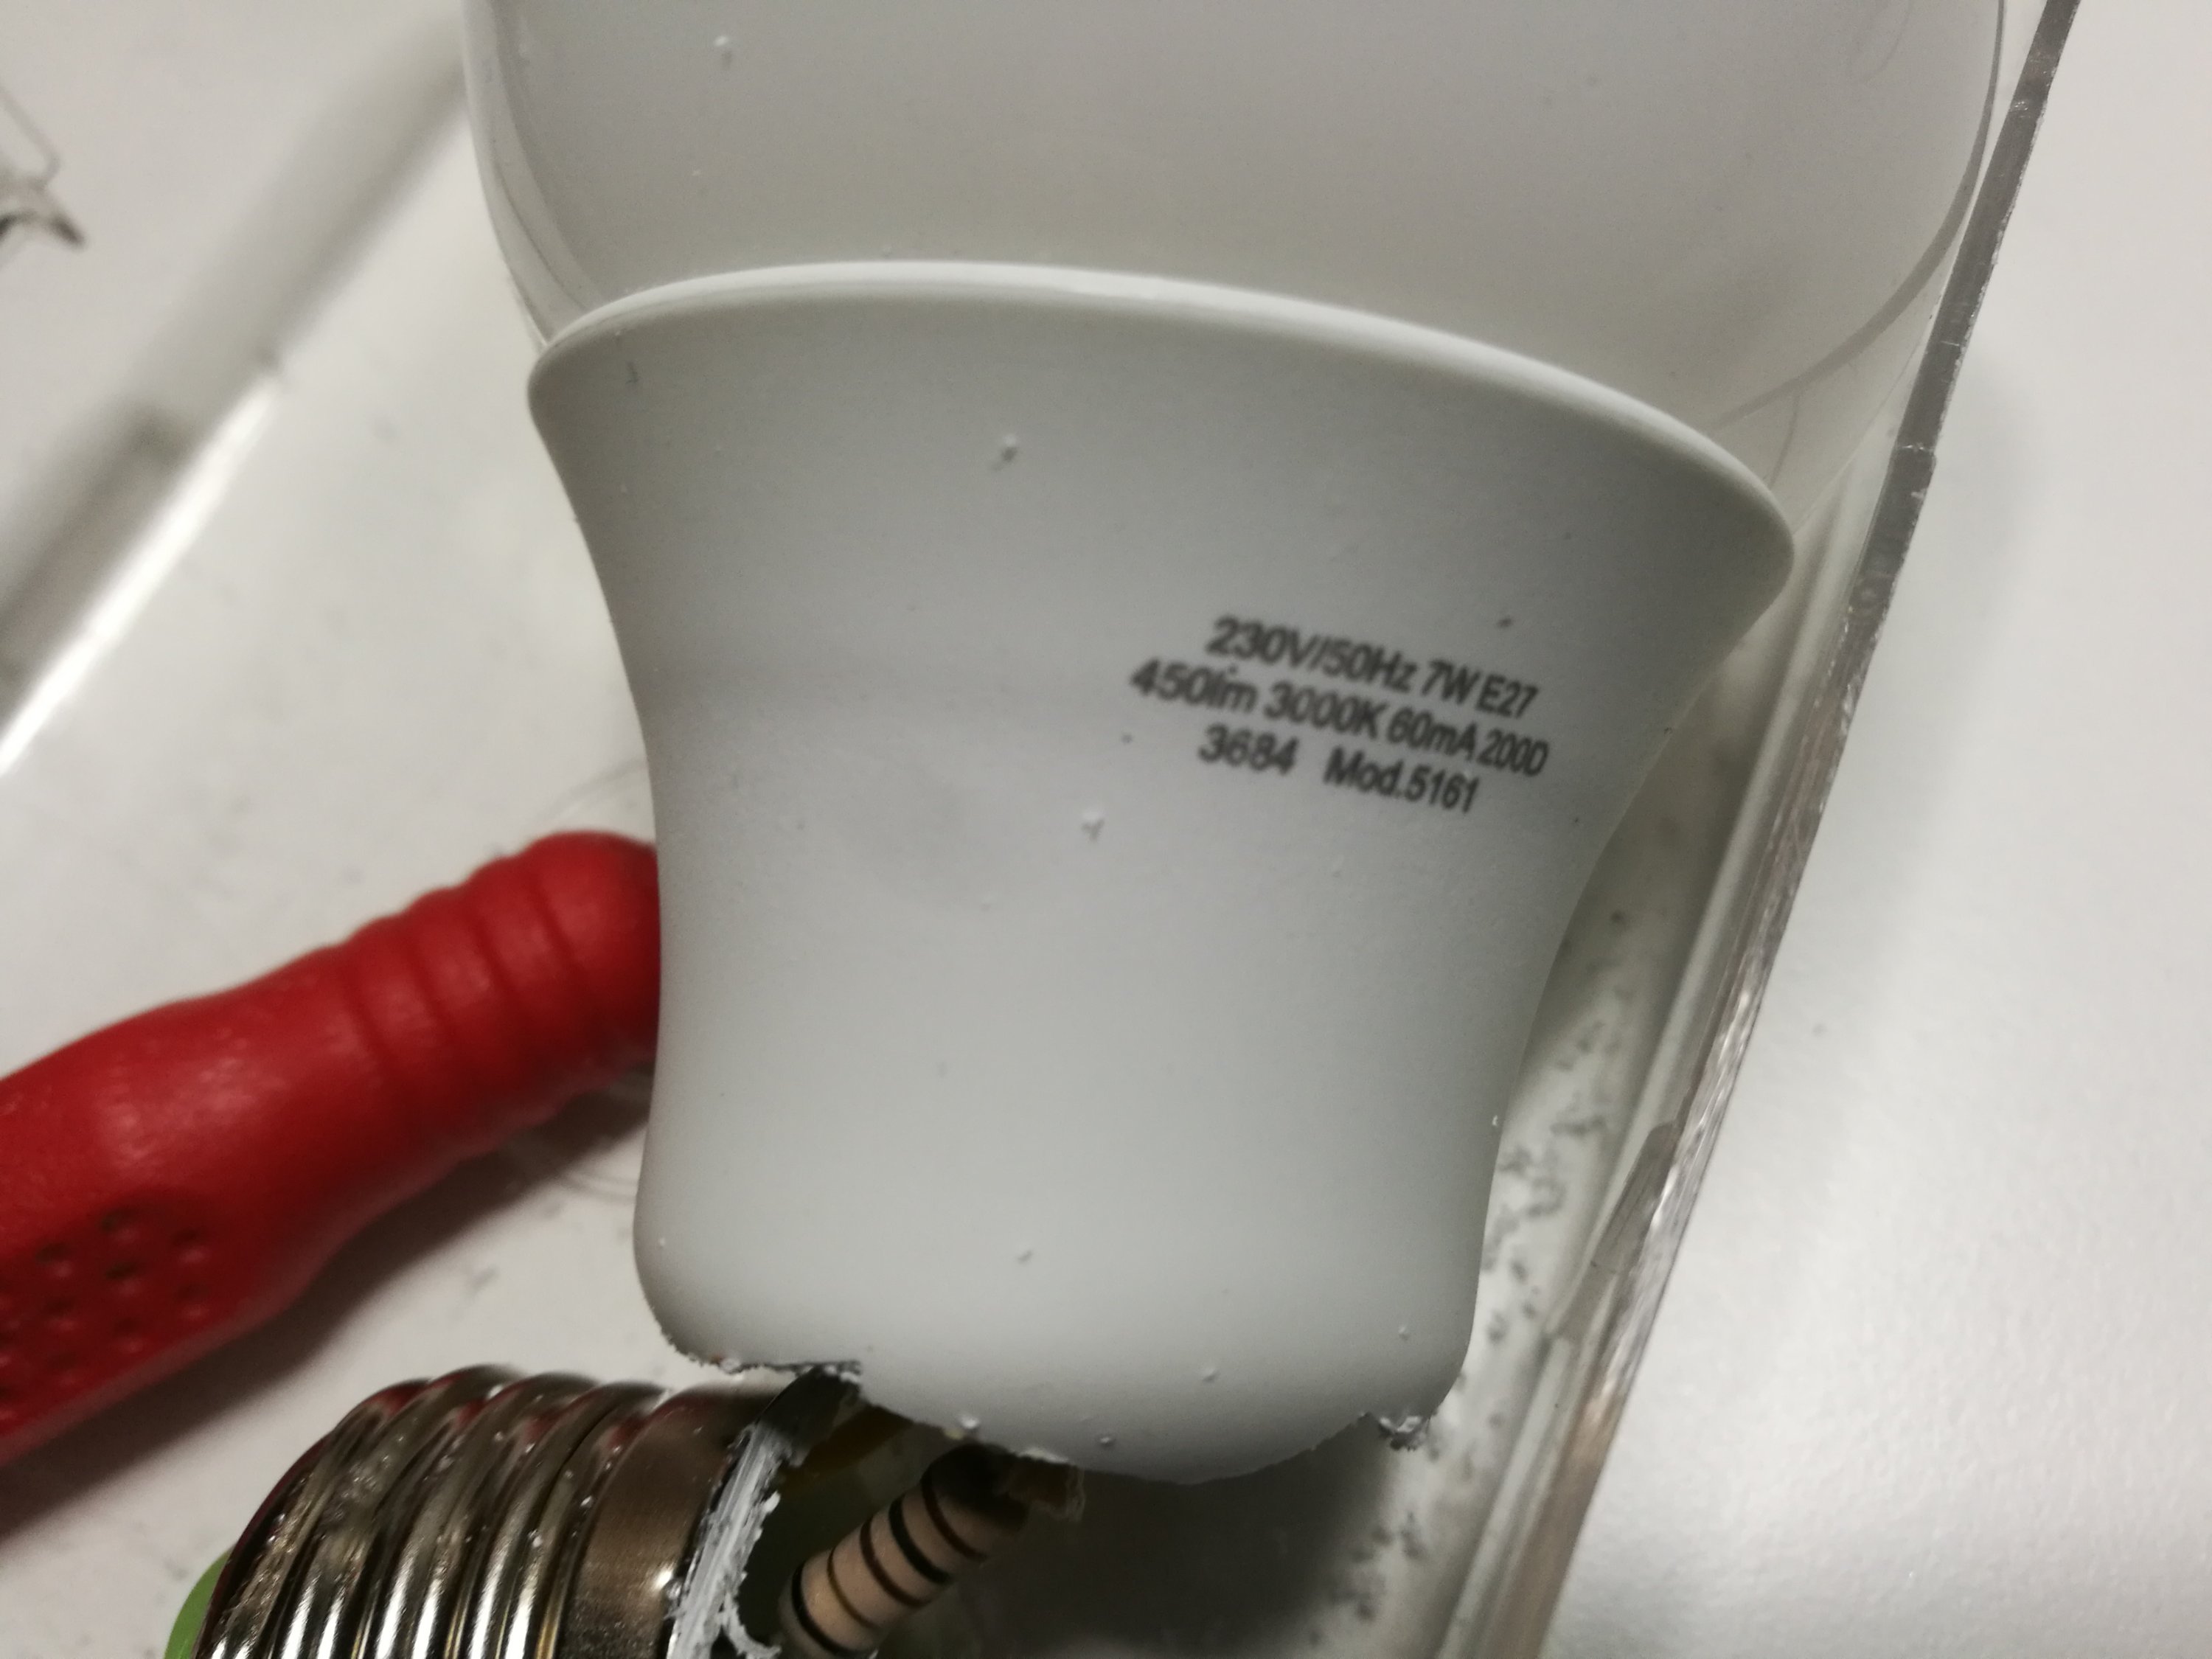
230V 50Hz 7W E27
450lm 3000K 60mA 20D
3684 Mod.5161
So lets make a tear-down
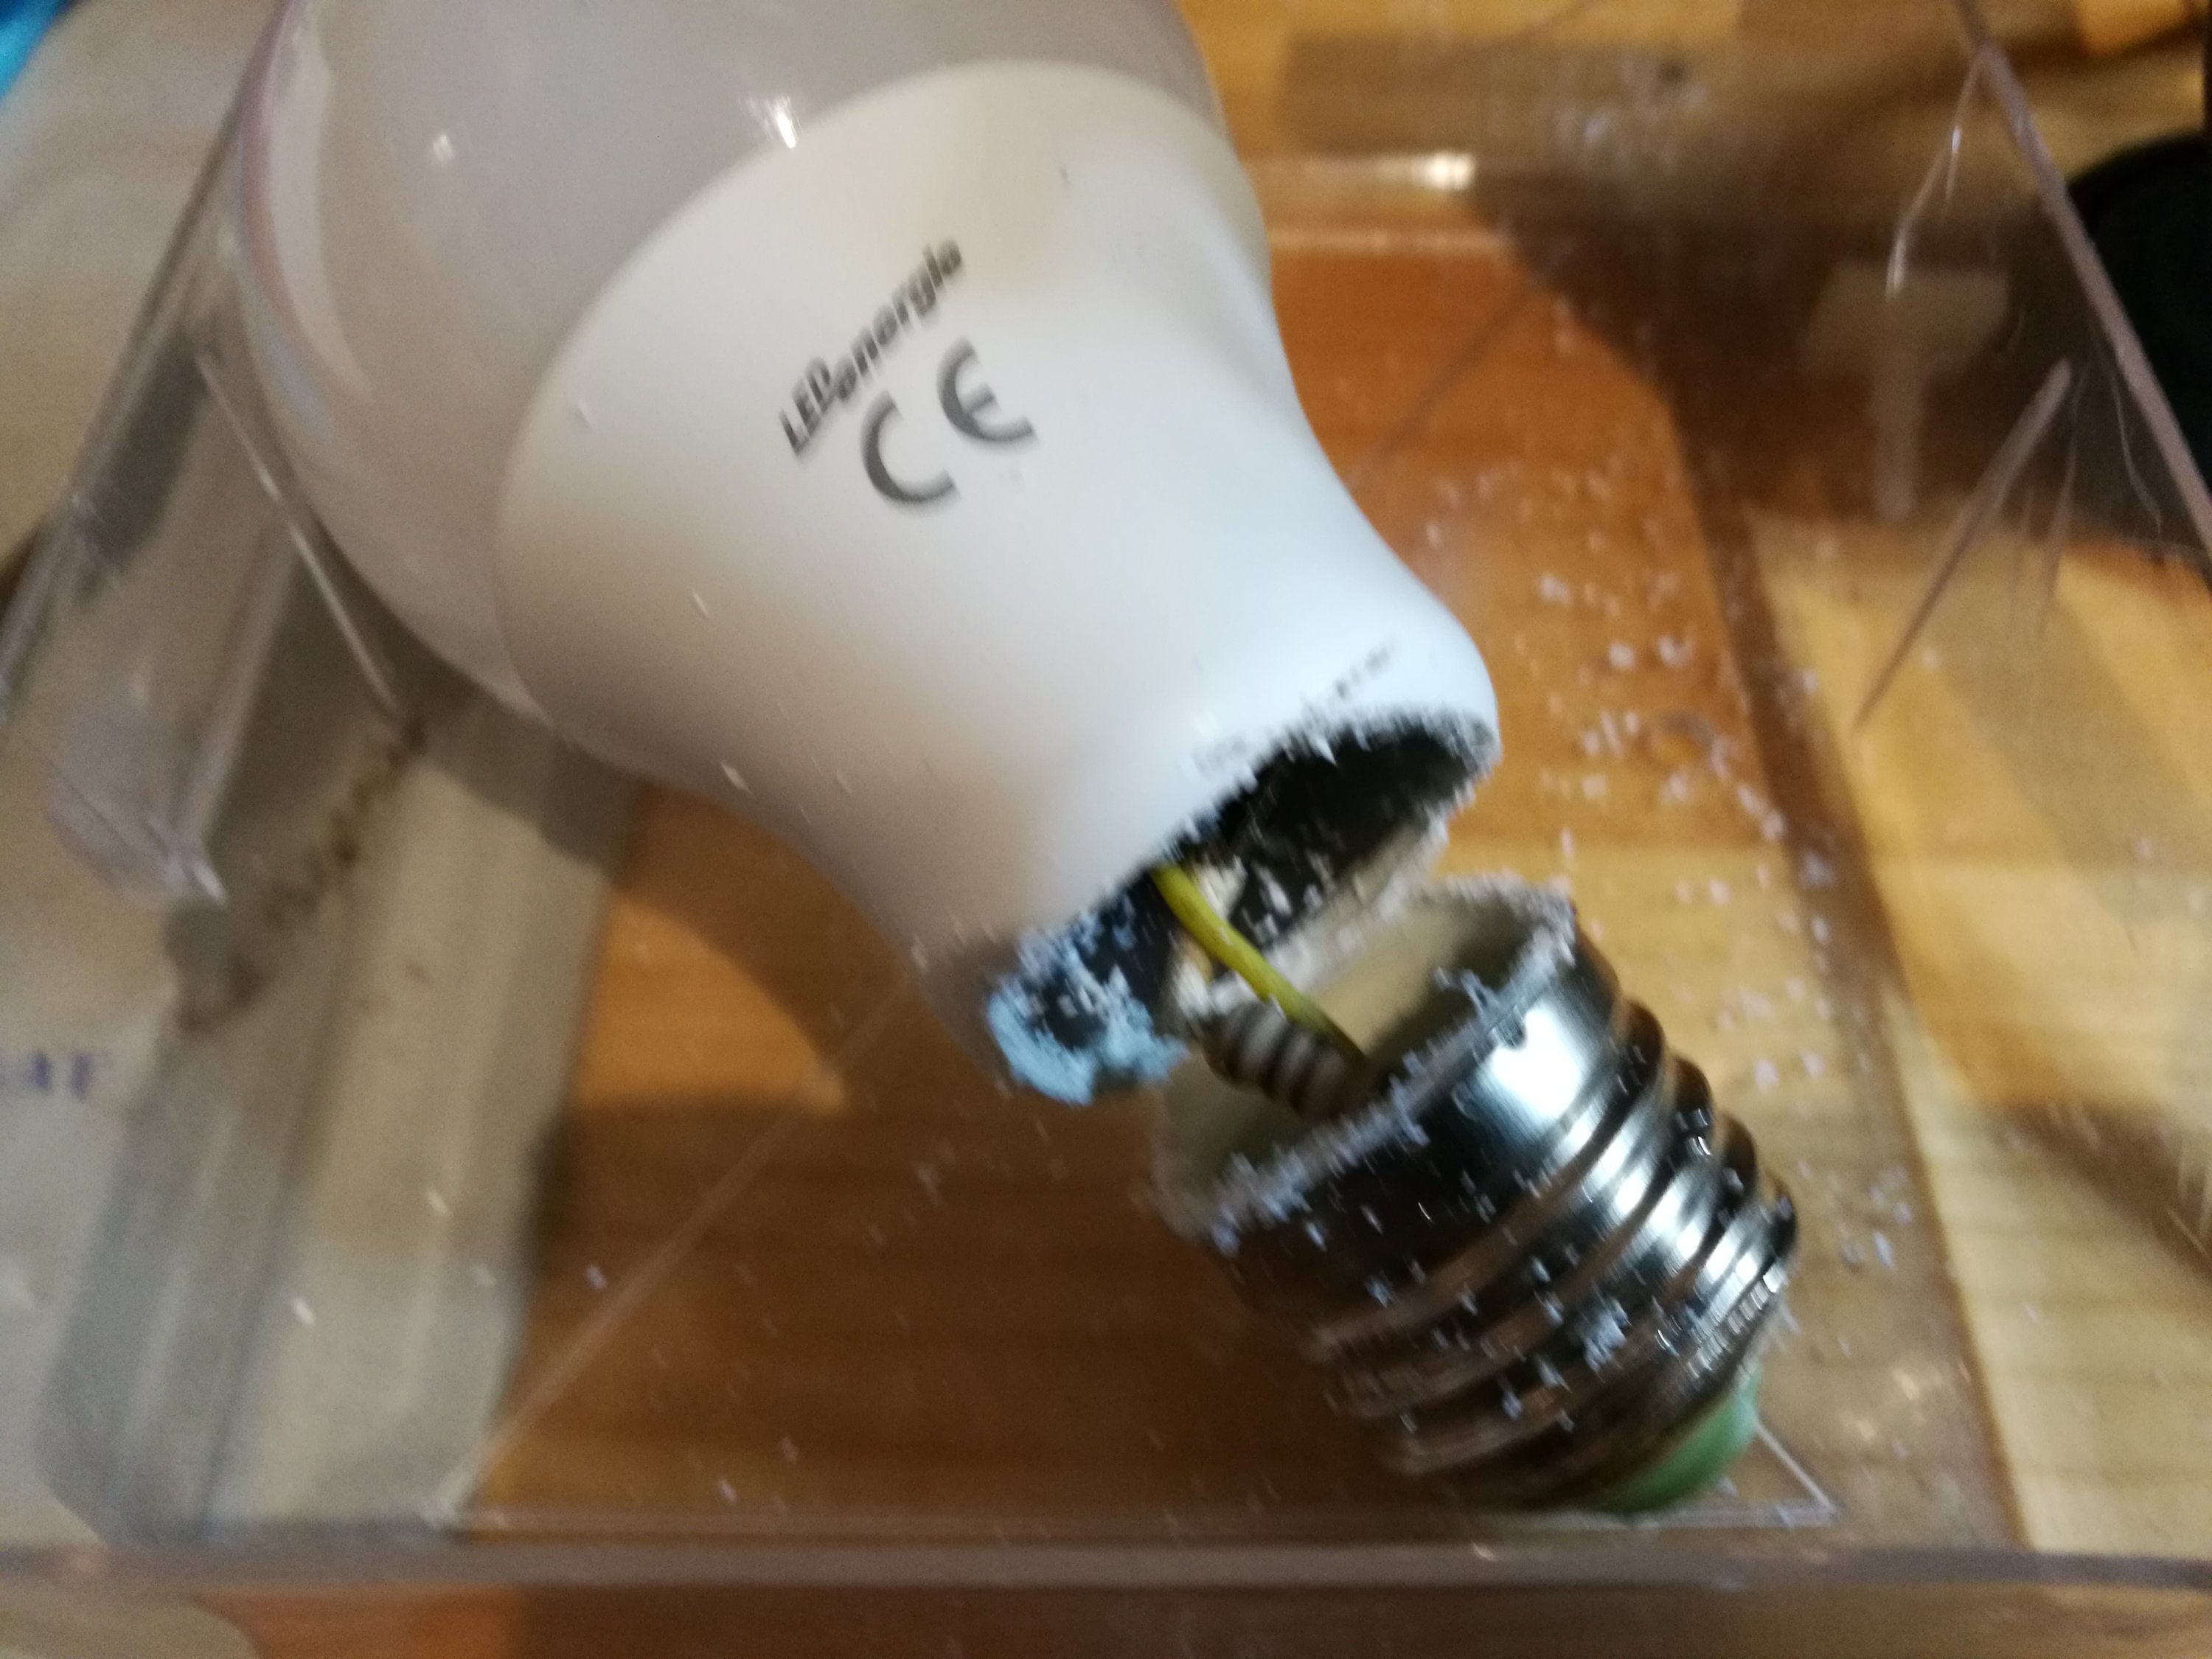
Inside
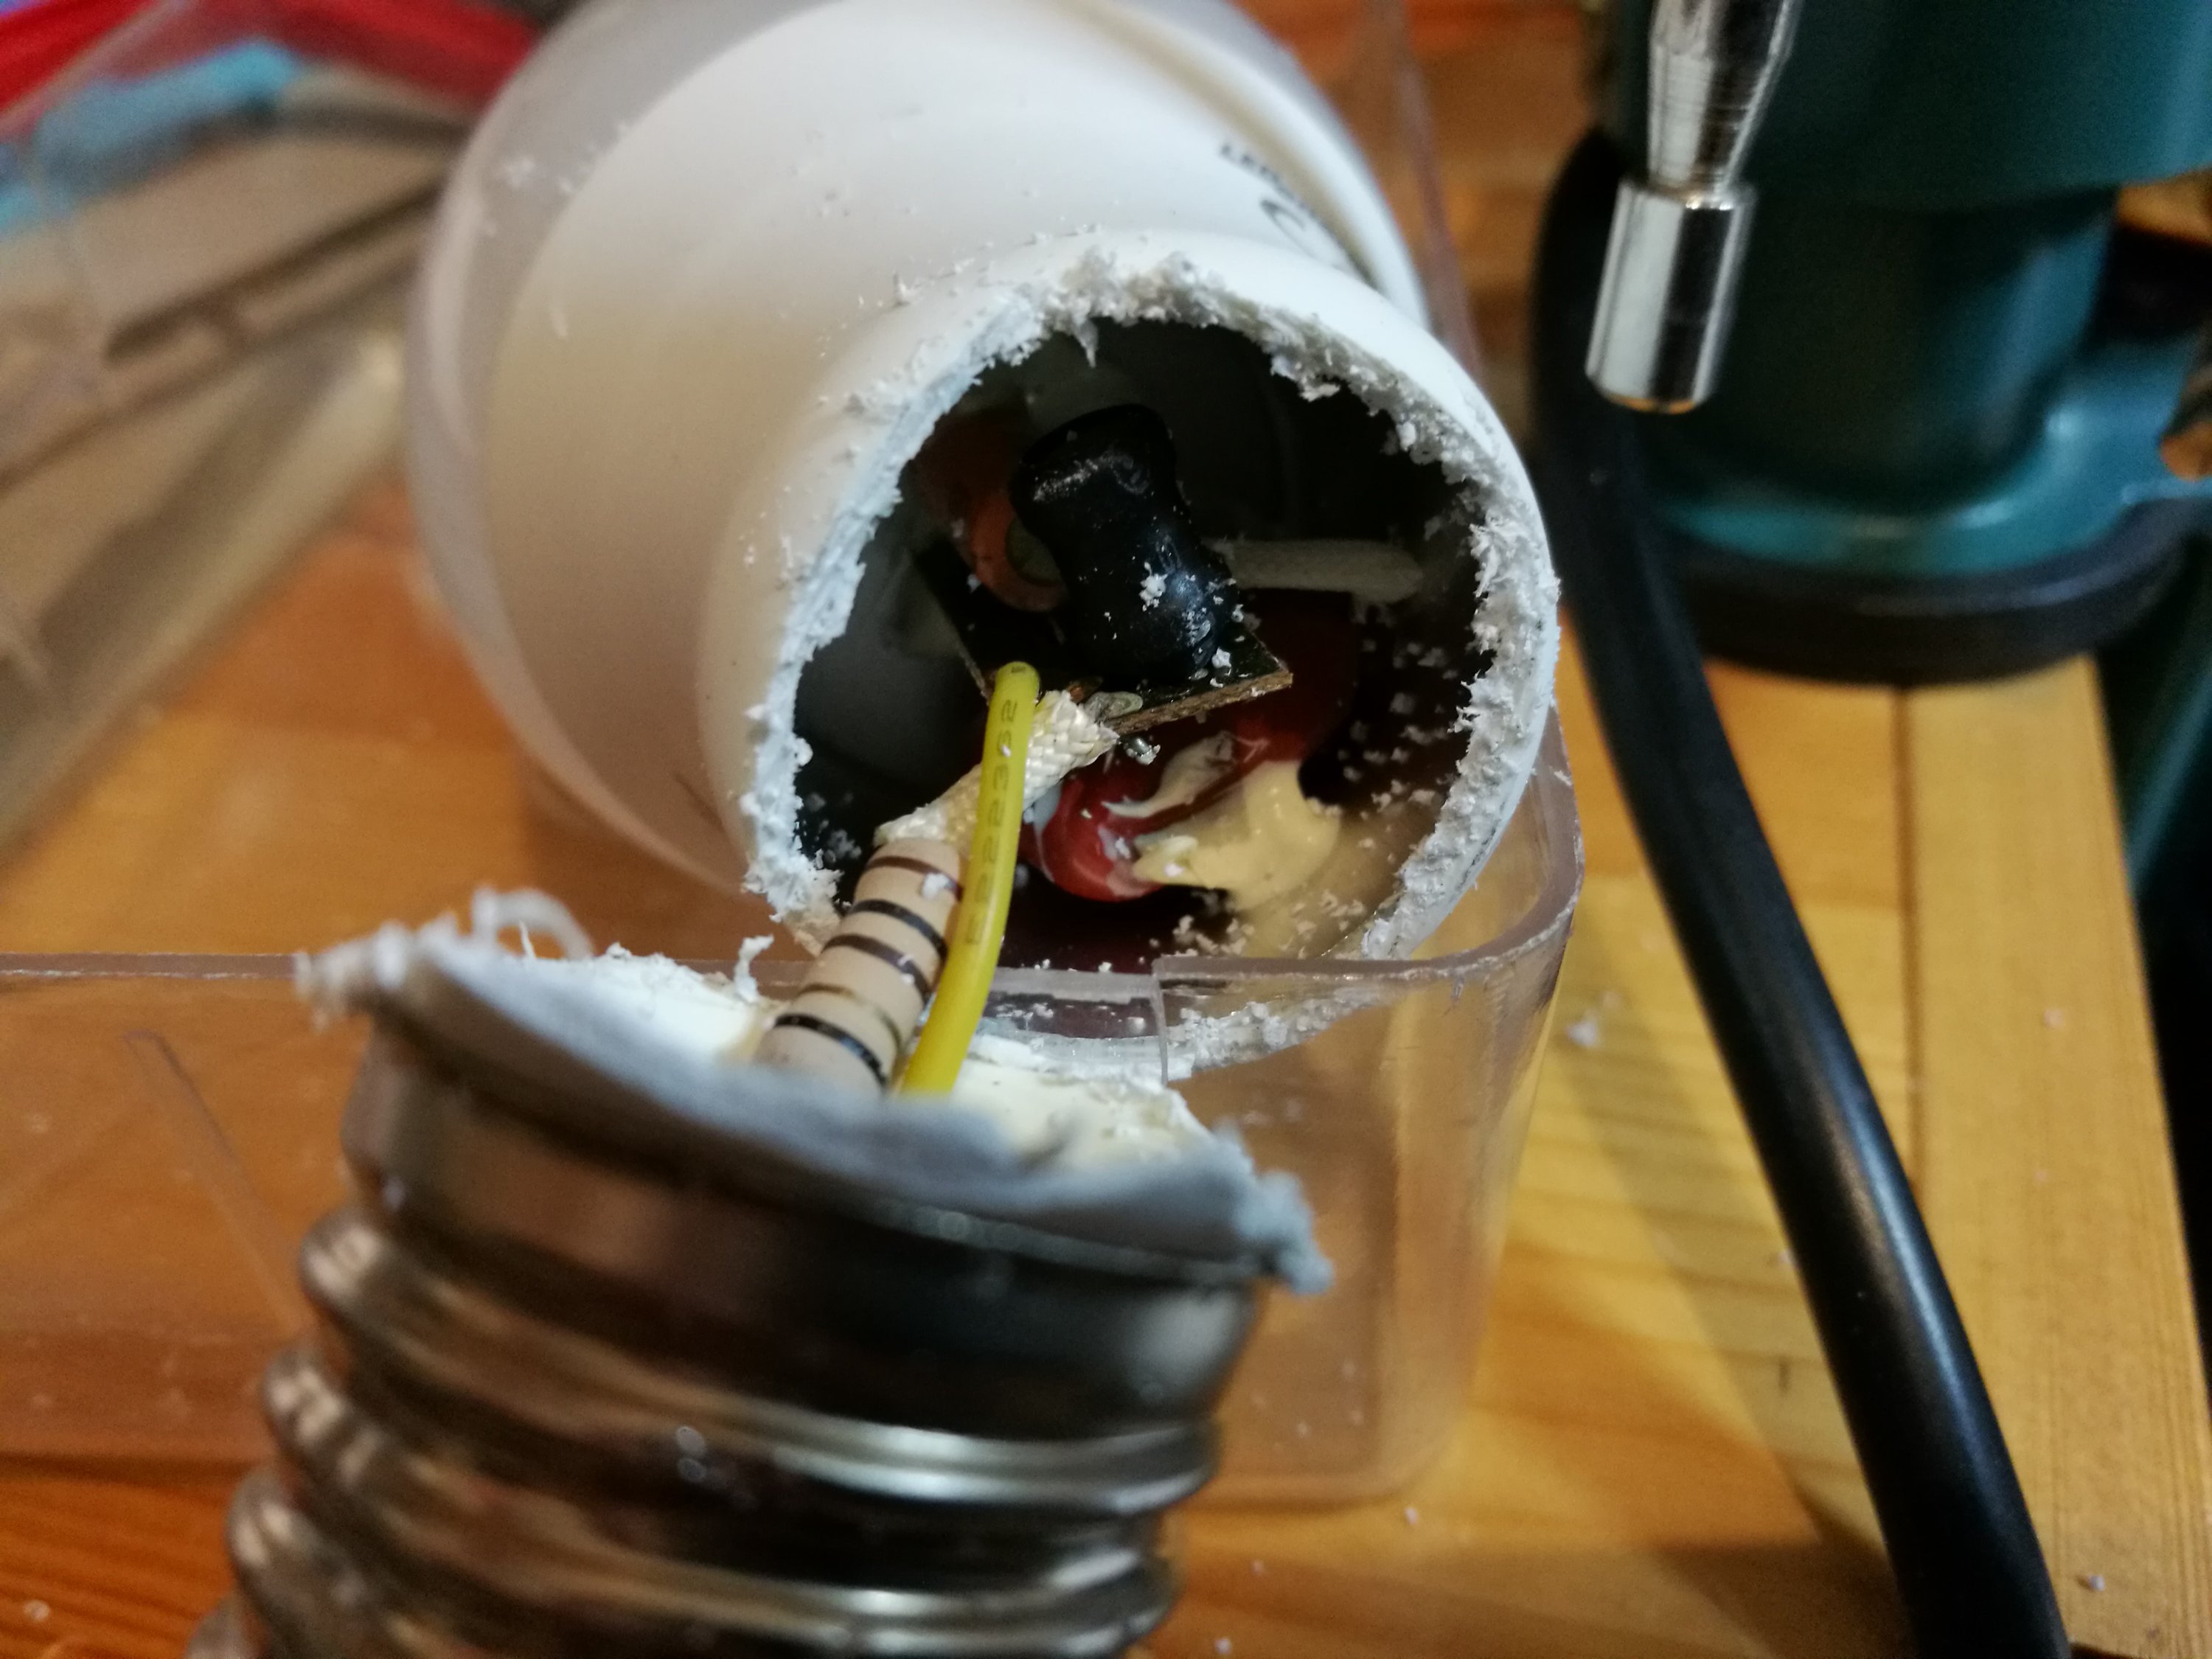
There seems to be 20 small LEDs in series inside bulb and one of them burned black. As such this LED string is expected to need around 70V over it. LEDs were soldered to a aluminium circuit board thar was glued to aluminium tube inside plastic lamp base part.
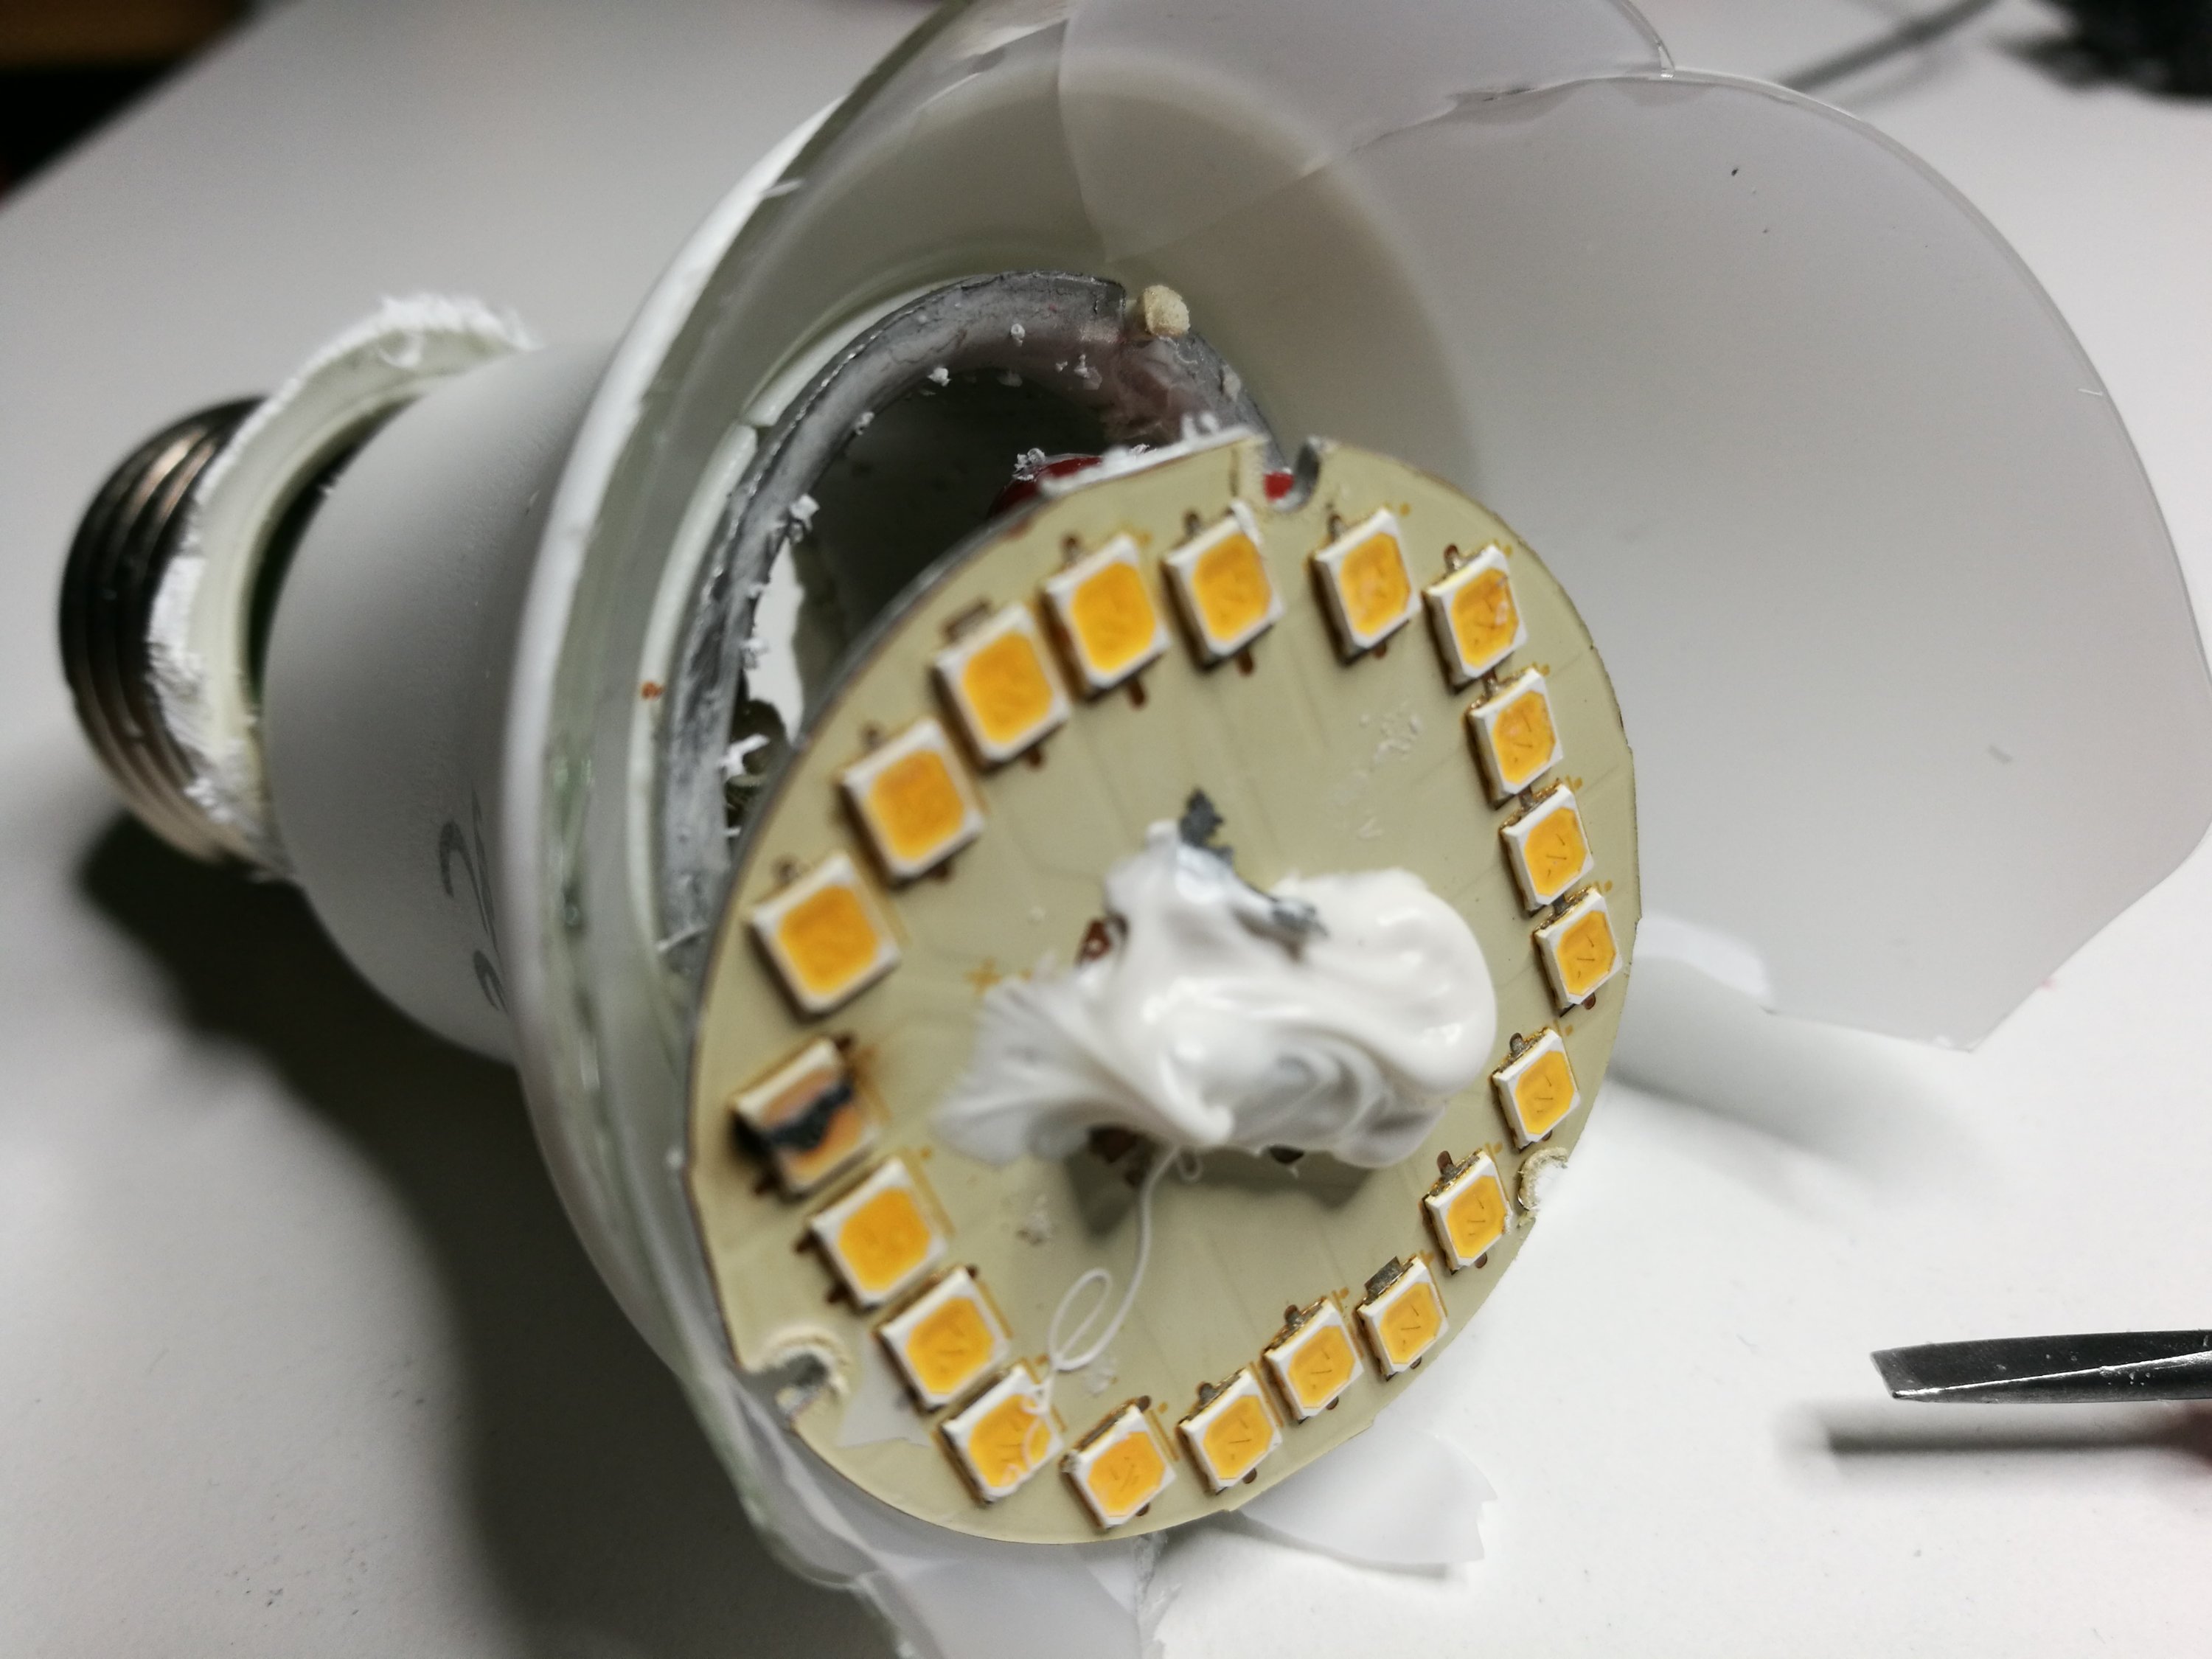
Look at the circuit board
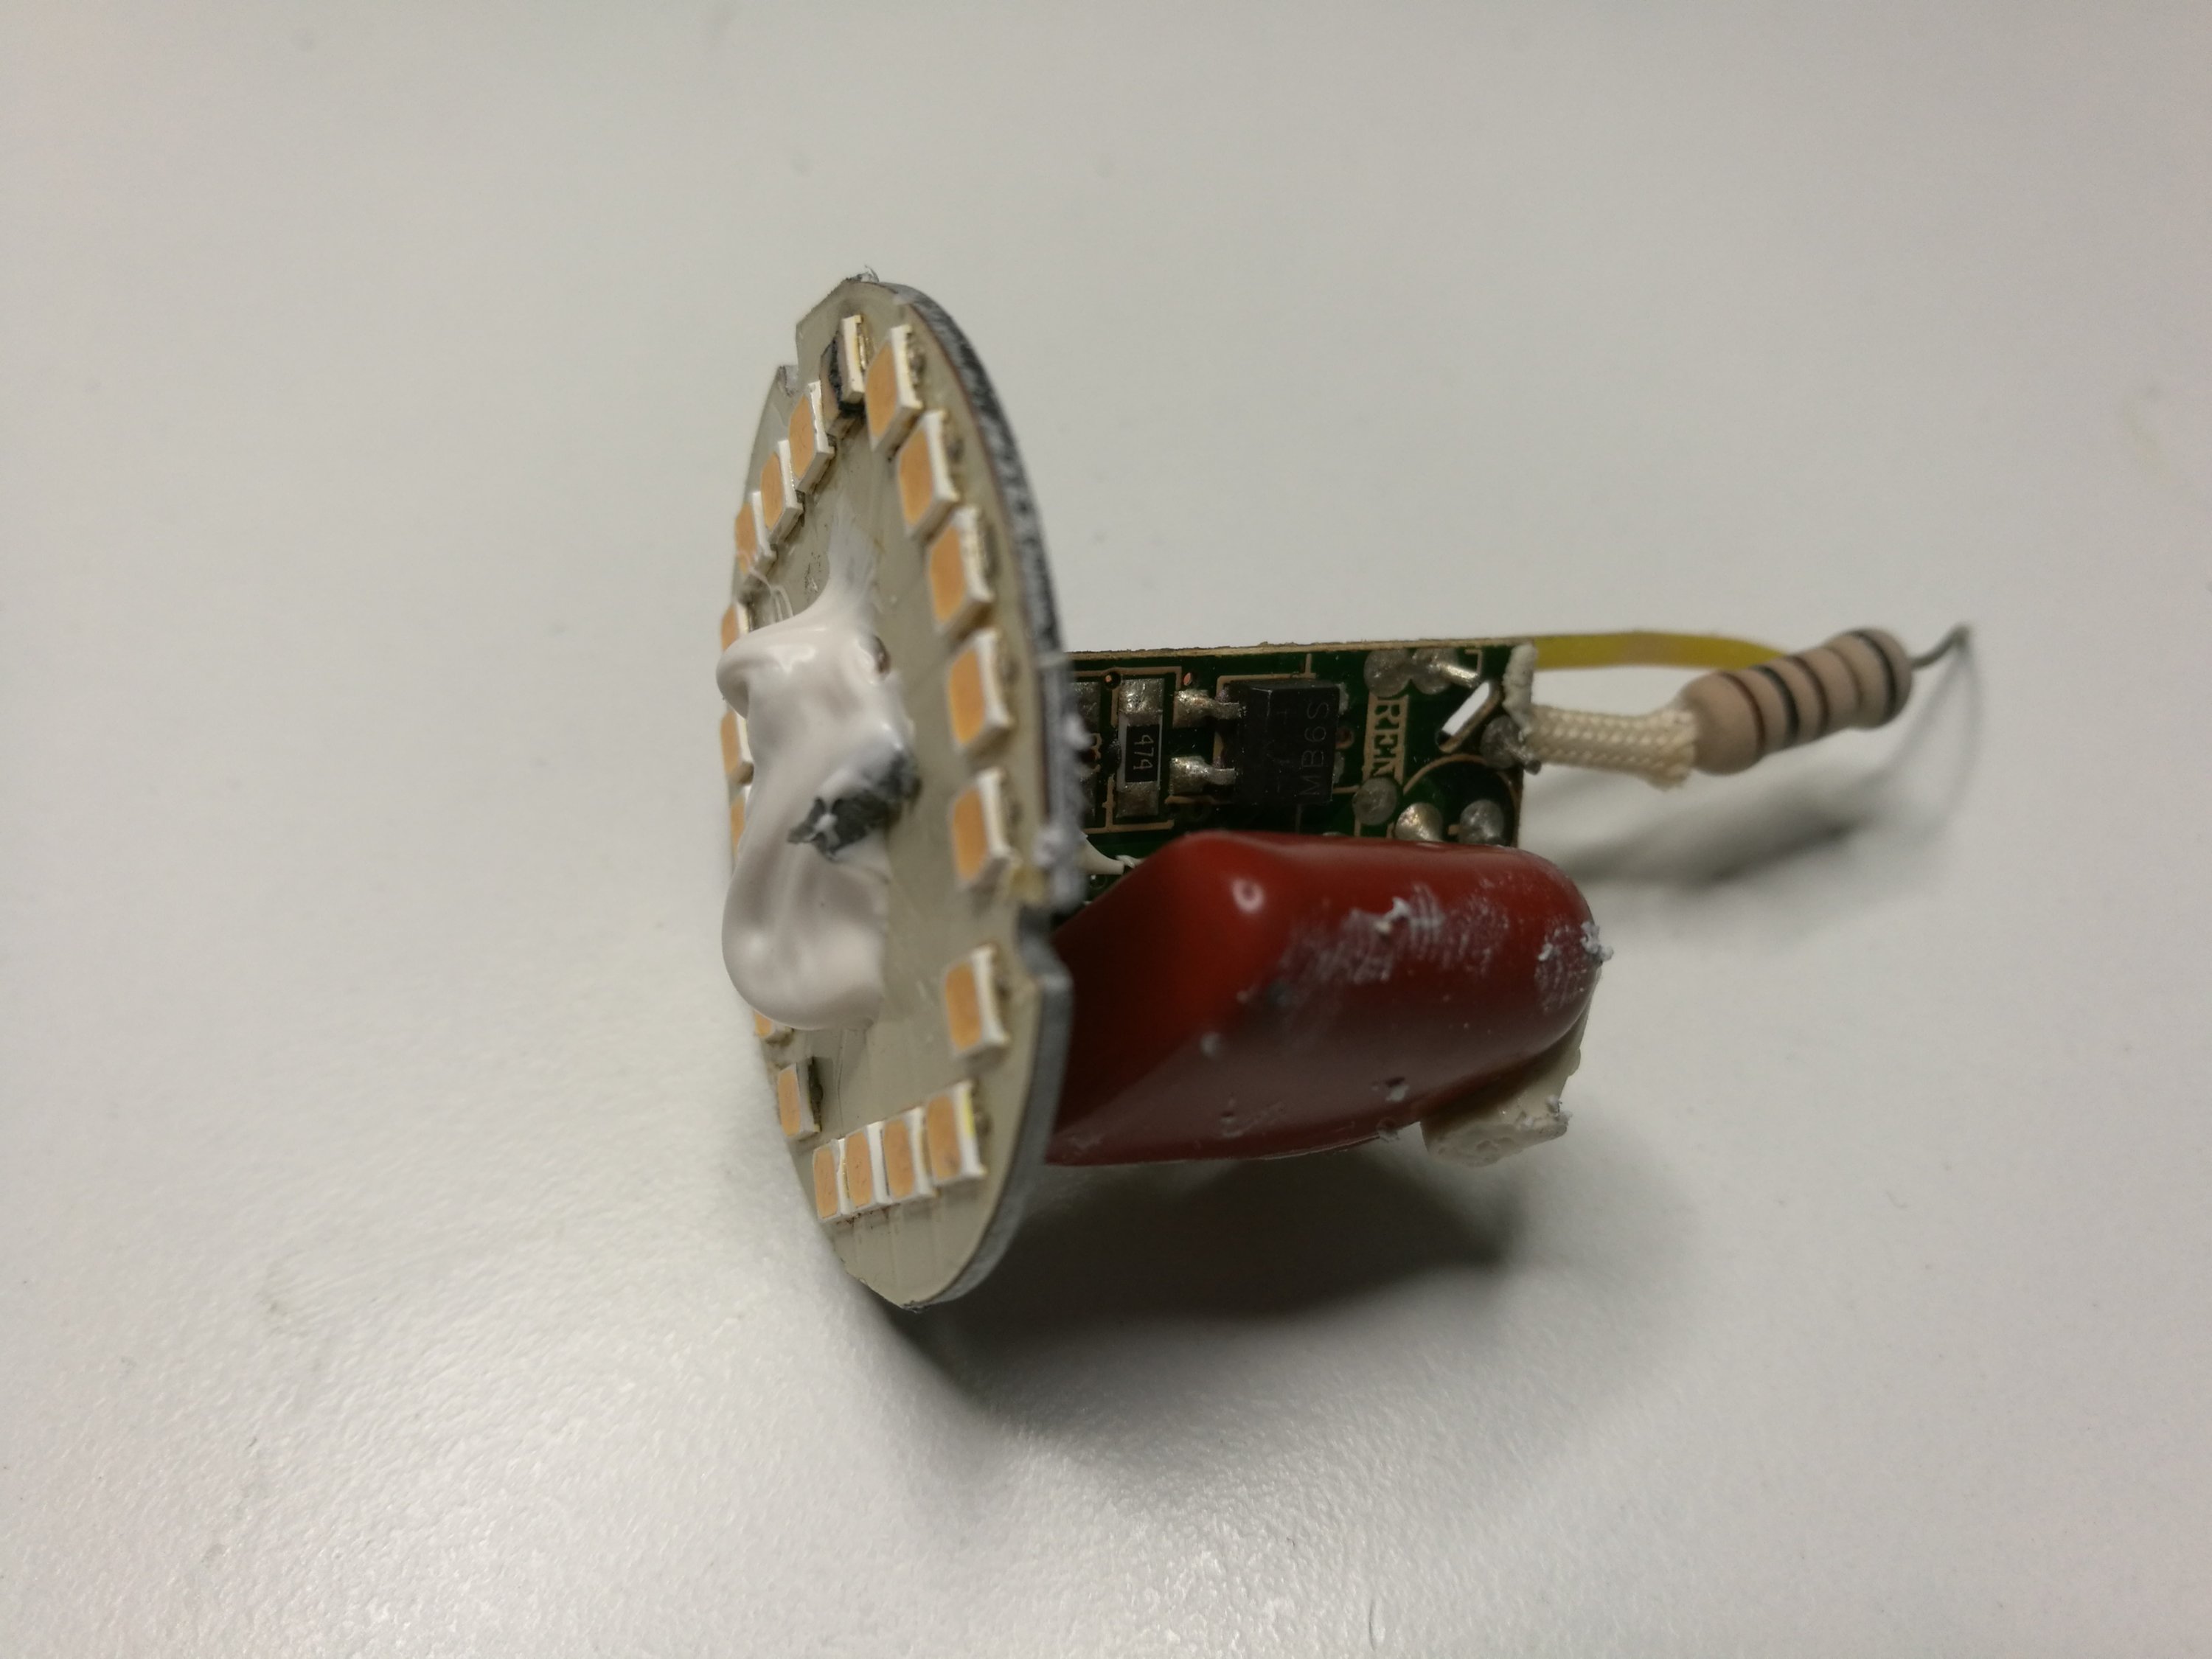
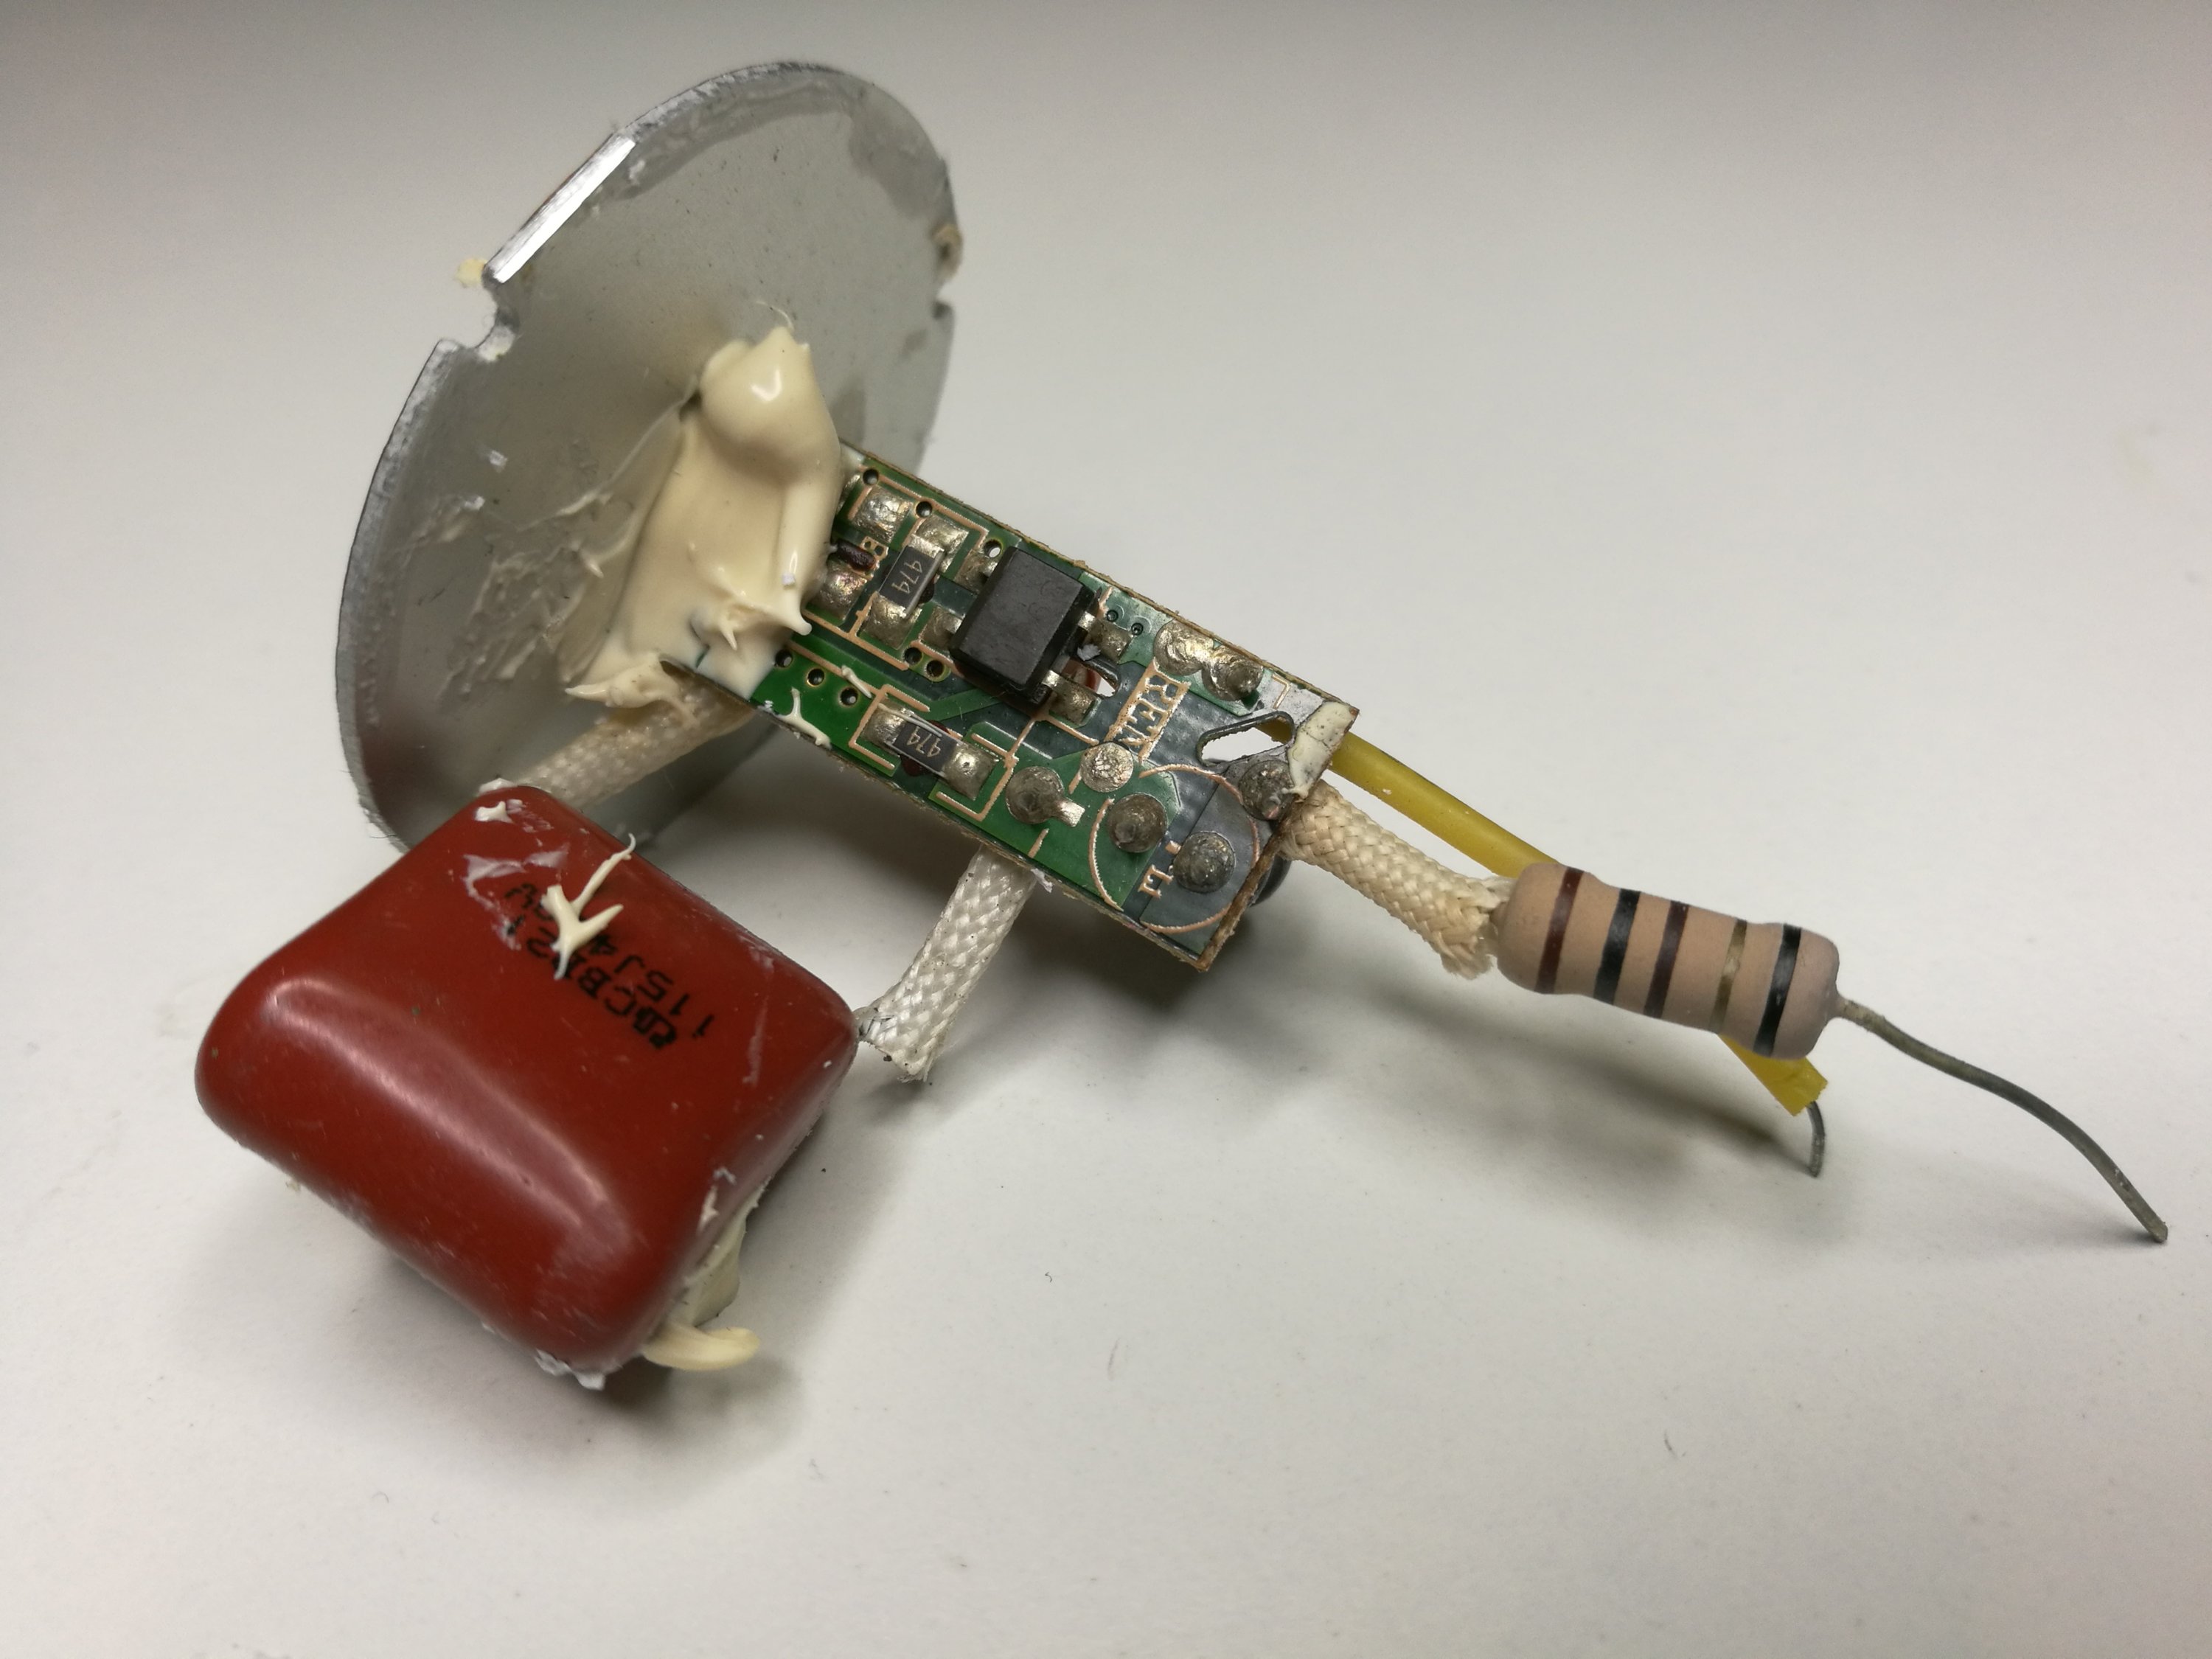
This looks like power supply is basically an RC current limiting (with small coil) followed by rectifier and small electrolytic filtering capacitor. In addition there are 470k bleder resistors to discharge capacitors.
The big resistor is a bit suspect here. According to color code it should be 100 ohms, but multimeter reading says 295 ohms. I suspect that either it has changed value or color code has changed colors due heating.
The RC circuit capacitor was 1.1uF 400V. The filter capacitor after rectifier was 2.2uF 400V electrolytic.
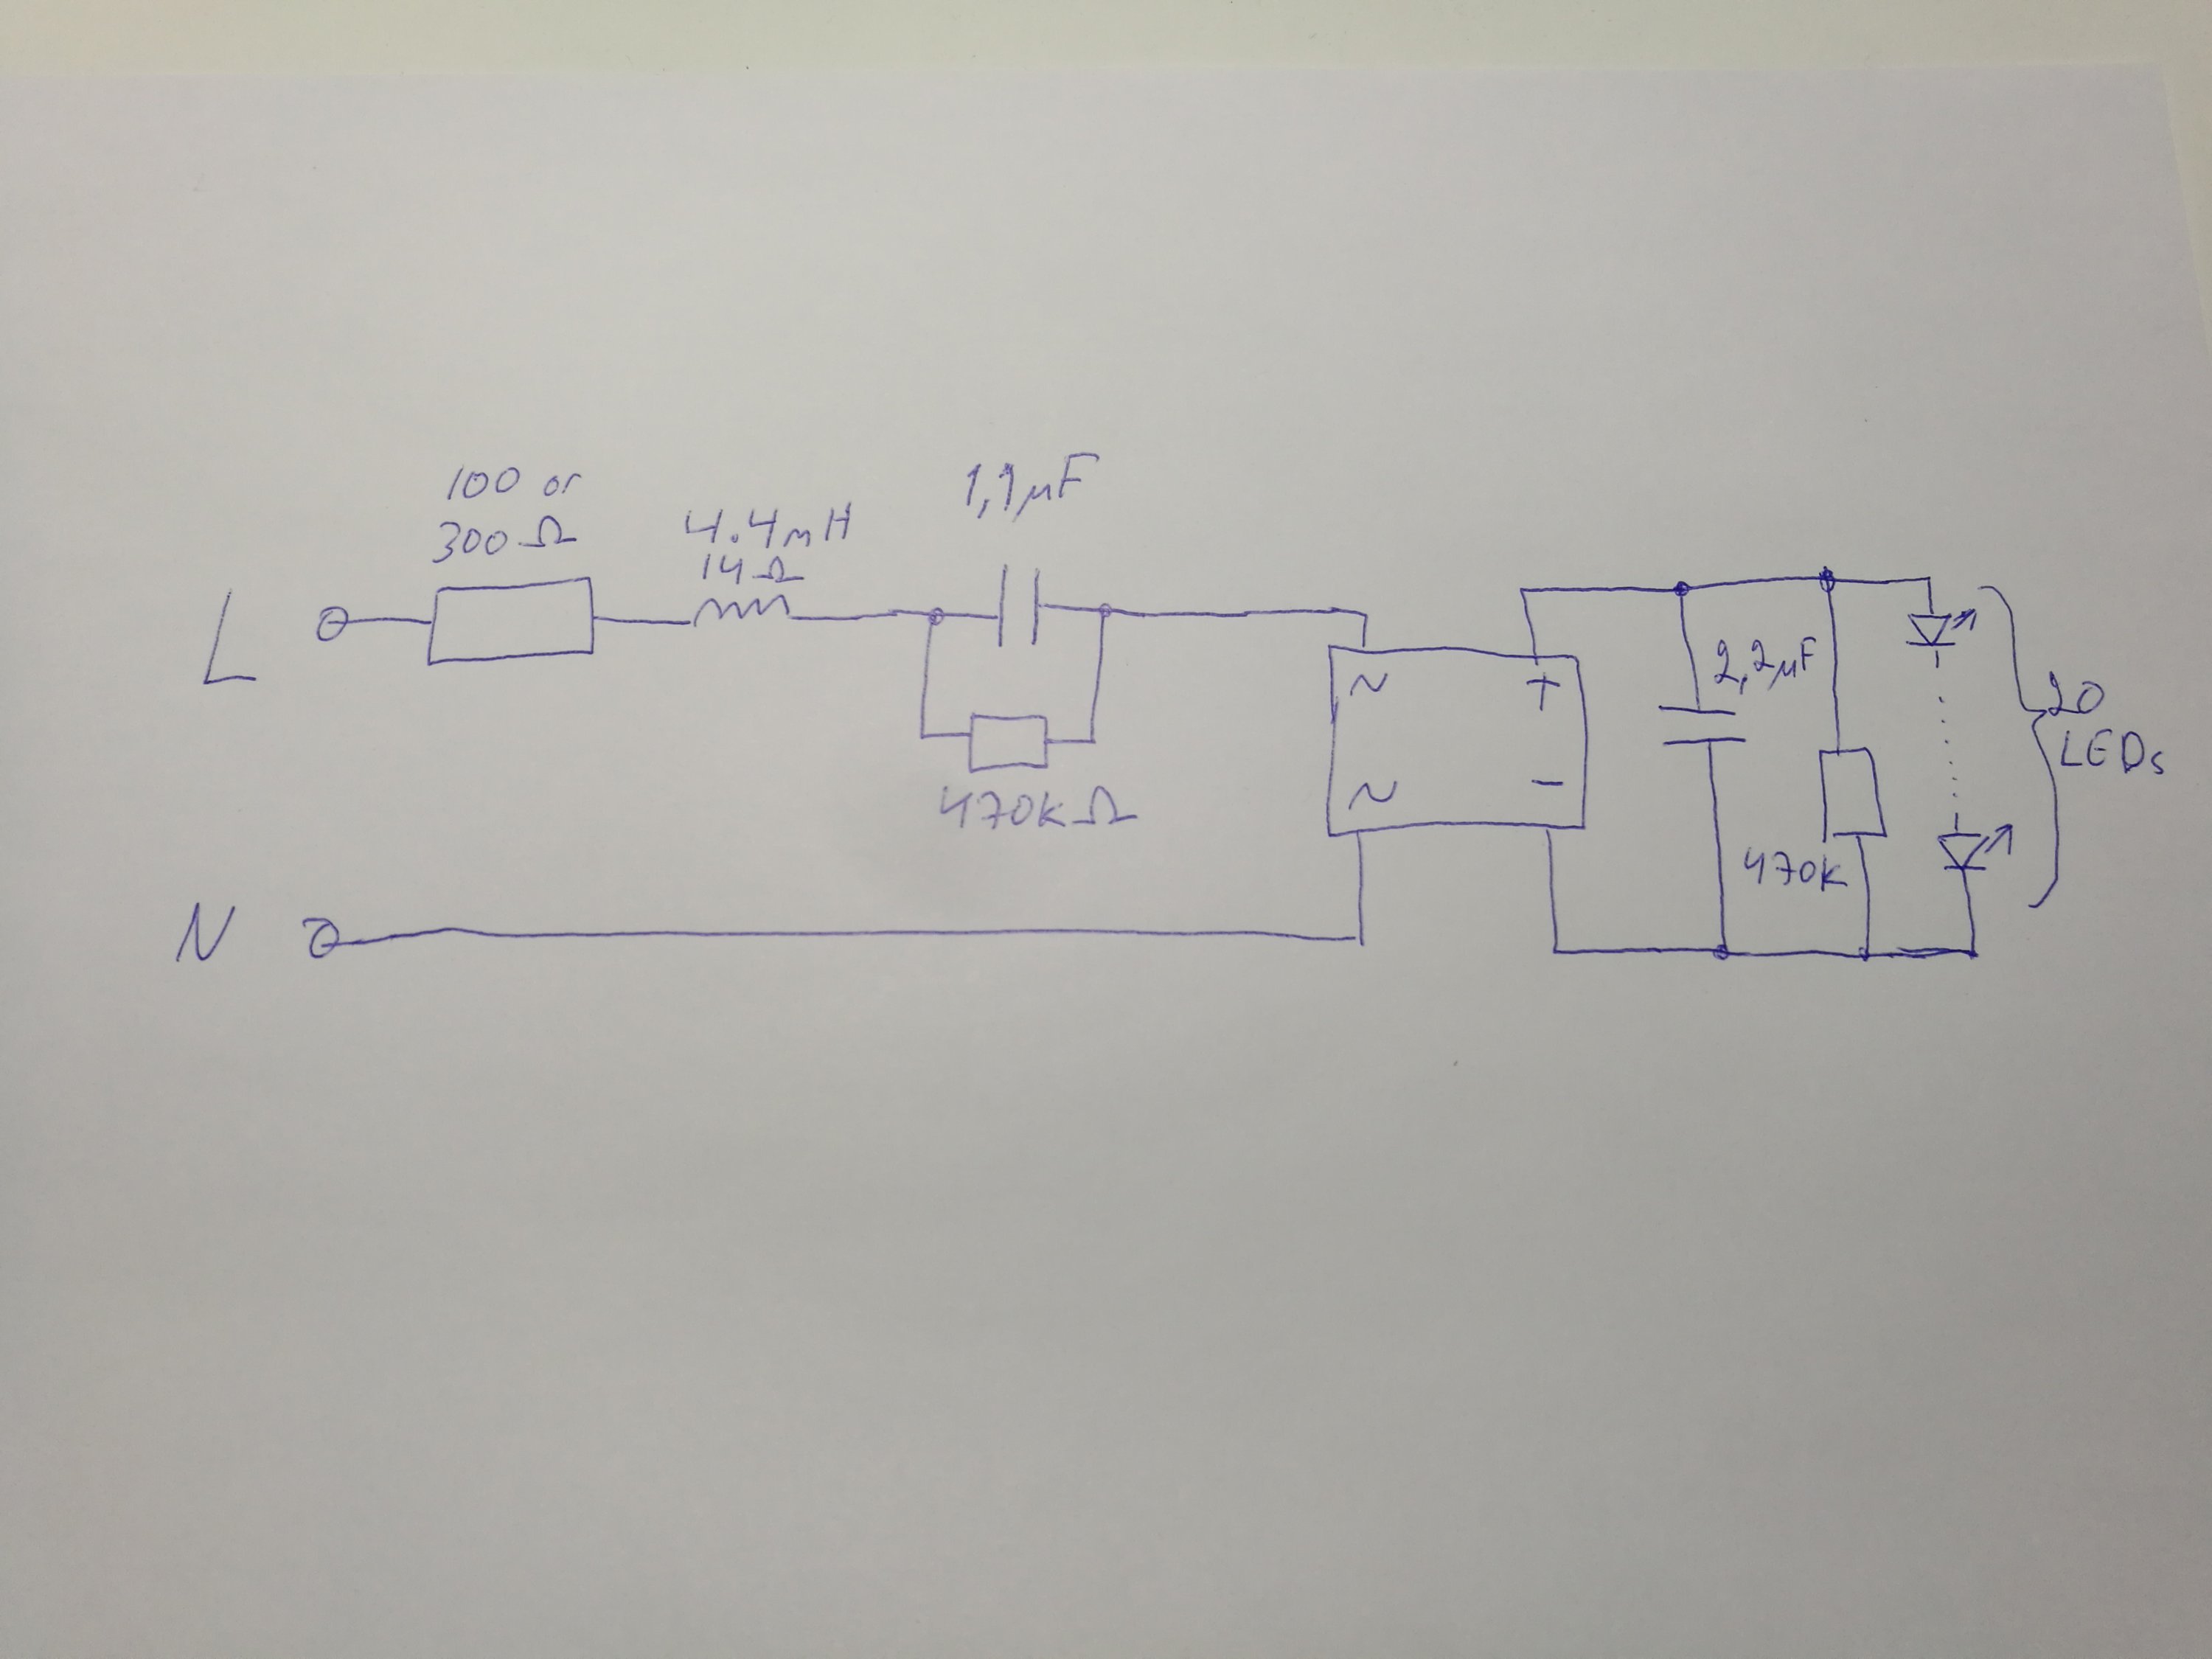
Here is the reverse-engineered circuit disgram:
197 Comments
Tomi Engdahl says:
PIR LED lamp teardown. (With schematic.)
https://www.youtube.com/watch?v=kXoPr6Vorzg
The LED lamps with PIR (Passive Infra Red) detectors in them seem to have become a common thing. So I thought it was time to buy a recent model and take it to bits. This one was surprisingly modular with three distinct PCBs one of which had two sections of circuitry on it.
Tomi Engdahl says:
Old arcing switch killing LED lamps.
https://www.youtube.com/watch?v=xLhng9BI9Mw
I’ve had two Philips LED lamps of the same type fail for the same reason. Arcing switch contacts.
Arcing contacts are really bad news for capacitive dropper based LED lamps as the dropper capacitors do their best to suppress the electrical noise and in doing so pass much higher current than normal. This stresses the rest of the circuitry and can kill LEDs and inrush/fusible resistors as has happened here.
This is actually a good demonstration of a typical class X capacitor or a snubber network doing its job.
teardown on the first failed Philips lamp a while ago:-
Dead LED lamp autopsy.
https://www.youtube.com/watch?v=N1v0x0pG4q8
When I turned on some of my ceiling downlighters there was a slight crackle and one failed.
I don’t know if it was the switch that arced or something in the lamp itself, and to be fair I still don’t know.
The lamp that failed was one of the Philips 2W LED GU10 lamps that uses a capacitive dropper and a group of four SMD LEDs that each contain about 4 chips.
Tomi Engdahl says:
Dangerous Chinese LED Lamp – mains exposed! (test, teardown, schematic)
https://www.youtube.com/watch?v=CT-dYbgbx4I
Today I took a look at a very dangerous LED lamp from China. The board with the 2835 SMD LEDs has no cover and the LEDs are live at mains voltage. Live terminals exposed! It also has no fuse, poor heat sinking, no inrush resistor and the actual power is not what the listing claims.
Tomi Engdahl says:
Mains Voltage LED (and how NOT to handle mains voltage!)
https://www.youtube.com/watch?v=PklaByEQSZA
Testing a mains voltage LED from China. This one is rated 220V and 20W. It really can be connected directly to AC mains with no LED driver. 30W and 50W versions are also available. In the listings it’s called “smart IC” or “integrated driver” or “driverless” COB LED.
Tomi Engdahl says:
Ebay $1.50 Filament LED lightbulb teardown (2W)
https://www.youtube.com/watch?v=f5IekLLWbyU
Teardown of a filament LED lightbulb from Ebay for $1.50 including shipping. Rated 220V 50Hz, the nominal power is 2W, real power is cca 1.6W, it has a E14 screw base. It is quite bright and looks nice, but there’s no fuse in it. There’s also no filter capacitor, so it has a lot of 100Hz flicker
It has a capacitor dropper in it with a 330nF capacitor, 1M discharge resistor and 1k inrush resistor. The 330nF multi layer ceramic capacitor looks quite small for the mains voltage.
Tomi Engdahl says:
Dimmable LED Lightbulb – INSANE Schematic!
https://www.youtube.com/watch?v=lqLrV11wzco
Teardown of a dimmable 5.5W 470lm LED light bulb from Livarno Lux. Rated 220-240V 50Hz. It is completely filled with a resin. Disassembly was a bit tricky. The circuit is a “little bit” overcomplicated.
Drawing a schematic turned into insanity. It has BP3216 chip. The supply seemed to be a buck regulator, but actually it is a switching voltage inverter. This kind of inverter is capable of both step up and step down operation. There’s no big capacitor at the output of the bridge rectifier, so that it can work with a triac regulation. The output current of the inverter is proportional to the average input voltage. There are 14 LED packages
This one cost 2.50 USD and comes from a local supermarket.
Tomi Engdahl says:
Giant 19W LED Lamp + schematic + buck regulator explained
https://www.youtube.com/watch?v=aw_5DesTuSY
In this video I take a look inside a big and powerful 19W LED lamp from Lidl supermarket, made by Livarno Lux. I reverse engineer the schematic of it and explain how a buck regulator works.
The control chip is BP2839A. The transistor is BPM5001.
Tomi Engdahl says:
Lamps – 8w Led vs 60w Incandescent
https://www.youtube.com/watch?v=1bUEv5eF8LM
An 8w filament style LED lamp is compared to an older 60W tungsten filament lamp.
Comments:
Very impressive. I’ve always found LED lamps to give out a rather ugly colour, even the warm white ones.
CFLs were just all horrible, in my experience.
Tomi Engdahl says:
Poundland 6W LED lamp teardown with schematic.
https://www.youtube.com/watch?v=a-exD1-6gsY
Tomi Engdahl says:
Teardown of the worlds crappiest nite-lite.
https://www.youtube.com/watch?v=2Dnl6wrfmlU
While ebay has some very low quality Chinese stuff on it, this little LED night light really takes the biscuit. It’s visually unpleasant and has such hideously underrated components that it’s only fit for the bin.
The circuitry is the most minimalist capacitive dropper possible, with a 100nF cap (with 820K discharge resistor in parallel) in series with three LEDs wired as a single LED and a pair in inverse parallel so it alternates between one LED and two on each half wave of the mains cycle, and a 330 ohm resistor to limit inrush current. Sadly the capacitor which is suspiciously small only has a voltage rating of 100V which is far short of the peak UK mains voltage (230/240V AC) of around 330V. Yeah, rated at less than a THIRD of the supply voltage.
In use the light flickers very visibly due to the alternating between the LEDs on each half cycle.
Such a shame.
Tomi Engdahl says:
https://hifiwigwam.com/forum/topic/92390-grounding-box/
If you maintain all original earth connections, then adding another one is more likely to induce ground loop hum than cure it.
This paragraph says it all to me: “If you can effectively remove or drain away the pollutants, stray magnetic currents and impedance fluctuations before they contaminate the sound, there becomes no need for the active synthetic filters & other such devices commonly recommended by many manufacturers. Our ground box’s are surprisingly heavy, feeling very solid and robust. However we do not talk about the specifics of construction, materials or any of the development technology housed within any of our products, especially the range of Ground Boxs.”
FFS, they can’t even spell ‘boxes’. And if anyone can explain to me how these will ‘drain away pollutants’ I’d love to know.
Total and complete bullshit, without even bothering to try and explain.
Very good point Serge but people see what they want to see and hear what they want to hear
Tomi Engdahl says:
New, and VERY interesting Poundland 5W LED lamps.
https://www.youtube.com/watch?v=b_eU3ZpN6aE
Note that in real use the 5W lamps are showing signs of heat related failure. So it may be better sticking to the more sensibly rated 3W units.
Poundland is currently engaging in rapid evolution of its range of LED lamps with a really surprising range of 3W, 5W and 6W LED lamps.
The most notable features are the use of multi-chip LEDs to fit a lot of LED chips in series in a smaller number of packages, plus the use of X2 suppression capacitors in the capacitive dropper circuit.
Tomi Engdahl says:
DIY LED floodlight conversion module with PCB file. (full build)
https://www.youtube.com/watch?v=nTQRRER1MOY
It’s clear that these very low profile LED floodlights with the “driver” chips on the same panel as the LEDs are not reliable. There seems to be an issue with the driver chips failing and blowing the multi-chip LEDs. So I thought it would be fun to build a complete new retrofit LED module to re-use the case as a much lower power LED floodlight that is best suited to low level ambient or functional illumination.
Tomi Engdahl says:
Inside a 2W TCP LED GU10 lamp.
https://www.youtube.com/watch?v=DIqiLNvO-Io
A look inside a TCP branded 2W GU10 LED lamp.
Quite a neat lamp with the front lens retaining ring clipped in flush with the front, but coming out easily. Inside is a typical plastic reflector/lens and a small PCB with three 3030 surface mount LEDs wired in series with the track underneath covering most of the area of the PCB to assist in thermal dissipation. The PCB has an aluminium base that is screwed onto the thermally conductive plastic body of the lamp. The screws also hold the front of the housing to the back which contains a mains voltage buck regulator.
Tomi Engdahl says:
Teardown of a 5W Rolson GU10 LED lamp.
https://www.youtube.com/watch?v=N5hH4HKxT4I
And here’s where I got a surprise! It was a traditional capacitive dropper as opposed to the more sophisticated switching circuitry often found in the higher wattage lamps. Here’s a breakdown of the circuitry.
Mains comes in and immediately goes through a 10 ohm resistor which limits inrush current and acts as a fuse. There’s a MOV (Metal Oxide Varistor) for transient protection, although it appears to be rated for 470V so it’s going to have to be quite a transient before it kicks in. One lead of the mains then goes directly to the rectifier (MB10S) while the other goes via a 560nF 400V capacitor with a 1M discharge resistor across it. The output of the rectifier has a 2.2uF 400V capacitor, a 330K resistor a mystery component (1328 XR) and the LED series string across it.
Tomi Engdahl says:
Burned Out 12W GU10 LED Spot Light Dismantled – Problem Found
https://www.youtube.com/watch?v=7H_T5qsX1ZM
This 12W GU10 LED spot light burned out after several hours of use. Took it apart to find out what failed. Looks like insufficient thermal was applied to the back of the LEDs. Also not enough grease was put between the LED plate and the metal heatsink.
Comments:
This is just another example of the major problem with Chinese made products. They go to all the effort (and consume all the resources) required to make a product, but completely stuff it up in assembly. They have no idea about quality control, yet are happy to slap “QC” stickers everywhere
This is why I don’t like LED lights they have just as many problems as a CFL, and they can die just as easily and I don’t trust super compact power converter circuitry that kind of circuitry can be a fire hazard in my eyes I get a bit OCD with appliances that can be a fire hazard in my home even a small house fire sucks.
I gave up trying to find good LED’s on ebay… just buy from a reputable dealer in the UK; it’s relatively expensive; but at least you’ll know they’ve been designed and assembled properly….
Tomi Engdahl says:
Lemonbest GU10 LED Bulb Review and Teardown
https://www.youtube.com/watch?v=W3wCuqE3C8A
Amusing name… a GU10 LED Bulb bought direct from China from the “HongKong Lemon Tree Co, Limited”! It was the cheapest GU10 I could find… surprisingly it’s not entirely awful…
Tomi Engdahl says:
Teardown of the worlds crappiest nite-lite.
https://www.youtube.com/watch?v=2Dnl6wrfmlU
While ebay has some very low quality Chinese stuff on it, this little LED night light really takes the biscuit. It’s visually unpleasant and has such hideously underrated components that it’s only fit for the bin.
The circuitry is the most minimalist capacitive dropper possible, with a 100nF cap (with 820K discharge resistor in parallel) in series with three LEDs wired as a single LED and a pair in inverse parallel so it alternates between one LED and two on each half wave of the mains cycle, and a 330 ohm resistor to limit inrush current. Sadly the capacitor which is suspiciously small only has a voltage rating of 100V which is far short of the peak UK mains voltage (230/240V AC) of around 330V. Yeah, rated at less than a THIRD of the supply voltage.
Tomi Engdahl says:
A look inside yet another LED night light.
https://www.youtube.com/watch?v=wyqAaeWabuE
The circuitry is very generic, but quite acceptable. The only obvious flaw with it is the ease with which the top cover can be pulled off revealing live connections.
Tomi Engdahl says:
Teardown of an LED high bay factory light.
https://www.youtube.com/watch?v=-uJ7xc0-tZg
It’s a high bay light designed for factory and warehouse use, with a standard high power LED array mounted on a heatsink with a lens assembly to direct the light downwards.
The core of the light is a big chunk of stylish aluminium extrusion designed to accommodate the LED, lens, reflector and top housing with channels for inserting self tapping screws.
The housing at the top contains a standard LED driver which is just loose and rattling about inside.
The core of the light is a big chunk of stylish aluminium extrusion designed to accommodate the LED, lens, reflector and top housing with channels for inserting self tapping screws.
The housing at the top contains a standard LED driver which is just loose and rattling about inside.
Tomi Engdahl says:
99p LED Nightlight
https://www.youtube.com/watch?v=8hlqBIwLbuw
A low cost mains powered LED nightlight is opened to see what is inside, and how the circuit of almost no components actually works.
Comment:
What a crap circuit design. It would actually be more efficient to remove the light sensor part al together and have the LED’s on 24/7.
It actually uses more current when it’s off!!
That Poor Transistor, who could be cruel enough to design such a thing. There’s no pride in engineering anymore :(
The circuit design uses a nasty trick: since the LEDs are always in circuit, the voltage across the 100uF will be limited to c. 9v. If you arranged the transistor to turn on the LEDs, you would need some other voltage-limiting component. If you simply used a zener to provide, say, a 12v DC supply, that would also take current all the time and add to the cost. The nastiness is that when one of the cheap chinese LED’s fails and goes open circuit, the 100uF electrolytic will explode. Seen this happen with mains LED lamps.
I had a similar device until I eventually tracked it down as the reason why my PowerLine networking would go slow during the night!
The C E mark is correct. There is supposed to be a space in the middle.
The product still screams China Export.
i love how this guys buys the worlds cheapest items and then complains how crap and dangerous they are. what the fuck did you expect, that’s why there so cheap.
Indeed, it’s unlikely that the fuse would be much help even then, as the resistors will only pass (assuming their value is accurate and the mains is at 240V) about 10mA, half-wave rectified (i.e. 7mA RMS after rectification; unless one resistor shorts, which would double it to 20mA half-wave/14mA RMS and dissipate a scorching 2.4W in the remaining resistor – though even that’s a rare event). The highest current that could flow without a complete dead short (or some resistor going low in value, which is unlikely) would be 20mA RMS. It’s difficult to make a fuse that will dependably blow at 20mA (let alone lower currents), and virtually impossible to make one that could reliably react to the tiny current increase from the electrolytic or transistor shorting.
Even for 99p, this looks quite poor to me; it’s not like it would have cost more to use higher-value resistors (for a more sensible current), and the silly shunt circuit could be done away with to instead spend the money on more useful parts.
That said, still it is hard to expect a good product from offending store. You may be able to find a good product at said stores but it is a crap shoot!
Tomi Engdahl says:
I’ve seen a similar arrangement but with a capacitive dropper instead of the resistors. With that the “shorting out the LEDs” trick does reduce power consumption – although the current goes up a bit, it’s now almost purely reactive.
Tomi Engdahl says:
Failed GU10 Led Lamps
https://www.youtube.com/watch?v=VNUFEpYQZCM
A selection of GU10 240V LED lamps.
The big resistor on lamp at 11:07 is a Fusible-resistor — marked F1 — they often come in funny body colours and unusual colour band patterns etc… Essentially they do have a specified, small, resistance value… when they get too hot they open-circuit permanently rather than going up in smoke…
And these are supposed to be environmentally friendly. It seems that unless they are made without cutting corners much more waste is created.
Tomi Engdahl says:
PHILIPS sub $10.00 LED “100w” BULB REVERSE ENGINEERING
https://www.youtube.com/watch?v=2LT70RAa1FM
1500 lm bulb for a break through price of under $10.00. A look at the engineering and performance of the bulb.
Philips part # 45591
Tomi Engdahl says:
Driverless 50W LED teardown and schematic.
https://www.youtube.com/watch?v=KKd2L9Exw0M
A complete teardown of one of the new driverless LEDs. It’s interesting that these devices seem to be based on the chips used in some LED filament lamps. They seem to share a common array of LEDs, but have a number of driver chips bussed in parallel according to the power rating.
Tomi Engdahl says:
Color me impressed: Looking at the 150W “Smart IC” driverless led COB @ 110v AC
https://mattgadient.com/2016/12/06/color-me-impressed-looking-at-the-150w-smart-ic-led-cob-110v-ac/
Tomi Engdahl says:
LED Lights – How It’s Made
https://www.youtube.com/watch?v=vsvElqcu_E8
Manufacturing process of LED chips.
Tomi Engdahl says:
Ebay $1.50 Filament LED lightbulb teardown (2W)
https://www.youtube.com/watch?v=f5IekLLWbyU
Teardown of a filament LED lightbulb from Ebay for $1.50 including shipping. Rated 220V 50Hz, the nominal power is 2W, real power is cca 1.6W, it has a E14 screw base. It is quite bright and looks nice, but there’s no fuse in it. There’s also no filter capacitor, so it has a lot of 100Hz flicker (not visible to the human eye unless you move it fast). It has a capacitor dropper in it with a 330nF capacitor, 1M discharge resistor and 1k inrush resistor. The 330nF multi layer ceramic capacitor looks quite small for the mains voltage.
How It’s Made LED filament Bulb
https://www.youtube.com/watch?v=ucAH-7yFmR8
Shanghai Xiangshan Chenglin Lighting Technology Co., Ltd. (Shanghai CrystaLED Lighting) is located at Qingpu Industrial Zone, Shanghai; The company was promoted by Shanghai Xiangshan Industries in 2013; Shanghai CrystaLED Lighting is focused on the development and manufacture of LED filament bulb products.
Tomi Engdahl says:
Mosquito Zapper with absurd manual – test, teardown & improvements
https://www.youtube.com/watch?v=vMUQ3Pfgq80
Today I tested an electric insect zapper from LIDL supermarket. Its nonsensical manual calls it both a zapper and a repeller (two completely different things) and also confuses UVA light with blue light. This zapper has 4 UV LEDs, a high voltage grid and a twilight sensor. I’ve reverse engineered its schematic and then successfully improved it.
Tomi Engdahl says:
Cleverly designed LED wall light with hackability.
https://www.youtube.com/watch?v=X–Y-pvRgRo
I was expecting this to be a very simple and cheap design, but it’s actually quite complicated and clever. It’s very clear that the design has evolved and uses standardised materials to allow a wide range of lights to be made quickly and easily.
There’s still the issue of no proper grounding/earthing connection, and the LED driver is the classic minimalist type with low efficiency and zero protection or filtering. But the base components are pretty good and hint at a possibility of adaptation to suit other applications.
Tomi Engdahl says:
Teardown of a Cree LED Light Bulb
https://www.youtube.com/watch?v=2Vm27xL57O0
This time the failed LED light bulb is a Cree one instead.
http://www.kerrywong.com/2017/12/16/teardown-of-a-65w-cree-led-bulb/
Tomi Engdahl says:
Teardown of a Philips Dimmable LED Bulb
https://www.youtube.com/watch?v=ntOHsebZTVU
These Philips dimmable LED bulbs failed within a few months of each other. Let’s see what’s inside. More technical details can be found
http://www.kerrywong.com/2017/08/27/teardown-of-a-philips-dimmable-led-bulb/
Tomi Engdahl says:
Flat, mains voltage LED tape.
https://www.youtube.com/watch?v=DXyOUch5taE
A look inside some mains voltage LED tape.
https://www.youtube.com/watch?v=laP–B3Ijgk
Tomi Engdahl says:
The Cree LED Floodlight Teardown
https://www.electronicdesign.com/analog/cree-led-floodlight-teardown?NL=ED-003&Issue=ED-003_20190322_ED-003_594&sfvc4enews=42&cl=article_2_b&utm_rid=CPG05000002750211&utm_campaign=24306&utm_medium=email&elq2=e96c82194ffa4b98ae66c70cf187a59a
This costly to make, but rugged, consumer product shows solid mechanical and electrical design. Paul Rako shines a light on what makes it tick.
I bought a 90-W equivalent LED floodlight at Home Depot several years ago. It’s obsolete now, but was state-of-the-art when I purchased it. My first abuse was to drop it, which cracked the glass lens. It’s a PAR38-style waterproof exterior light, but I use it to light my desk area inside. The crack was no problem for the last few years. A few months ago, one of the LEDs inside the lamp seemed to turn blue. It was time for a teardown
All in all, I am delighted with both Cree products, unlike the Philips PAR38 bulb I bought years ago that turns itself off when I use my paper shredder. Perhaps the Philips engineers should have called my pals at the Linear Technology part of Analog Devices.
Tomi Engdahl says:
Have LED Bulbs Reached Their Final (and Cheapest) Form?
https://hackaday.com/2020/02/16/have-led-bulbs-reached-their-final-and-cheapest-form/
[electronupdate] has done a lot of LED light bulb teardowns over the years, witnessing a drive towards ever-cheaper and ever-simpler implementations, and suspects that LED light bulb design has finally reached its ultimate goal. This teardown of a recent dollar store example shows that cost-cutting has managed to shave even more off what was already looking like a market saturated with bottom-dollar design.
https://electronupdate.blogspot.com/2019/12/dollar-store-led-bulb.html
Tomi Engdahl says:
https://www.edn.com/testing-solid-state-lighting-reliability/?utm_source=newsletter&utm_campaign=link&utm_medium=EDNWeekly-20200423
Tomi Engdahl says:
Testing a $1300 LED
https://www.youtube.com/watch?v=bBV-1VNWscA
The world’s brightest LED is SO POWERFUL that just powering it on is a challenge in itself!
Tomi Engdahl says:
https://www.edn.com/testing-solid-state-lighting-reliability/
Tomi Engdahl says:
Somewhat questionable repair method that can fix some LED bulbs…
Repair any LED bulb
in just 1 minute.. Absolutely free…
Repair any LED bulb at home free…
https://youtu.be/dJ6ZkQu3K14
Tomi Engdahl says:
LED GU10 Lamp repair!
https://andydoz.blogspot.com/2015/06/led-gu10-lamp-repair.html
Tomi Engdahl says:
Worst head torch ever. Setting a new (low) standard.
https://www.youtube.com/watch?v=84_vXw2R_5c
This is possibly the most utterly pointless design of a head torch ever.
Tomi Engdahl says:
Bogdan Radacanu Tears Open a TP-Link TK50 Smart Bulb, Finds a Surprisingly Low-Power Wi-Fi Module
https://www.hackster.io/news/bogdan-radacanu-tears-open-a-tp-link-tk50-smart-bulb-finds-a-surprisingly-low-power-wi-fi-module-86e91fe50f43
Purchased more for curiosity than use, the TK50 proved home to a high-efficiency Wi-Fi module — around half the current of an ESP8266.
Tomi Engdahl says:
You can drive most LED lamps with TRIACS without problems if you do simple on/off. Some can be dimmed also but many can’t.
Depending on LED bulbs they show as various combinations of capacitive and non-linear loads. Same applied pretty much to SMPS as well.
When triac is type that can handle enough peak current and keep conducting at low holding current should work with those types of loads. Even though LED bulb average power is only few watts, short time peak current can be up to few amperes.
https://www.epanorama.net/blog/2018/02/13/led-energie-led-bulb-teardown/
Tomi Engdahl says:
What is the purpose of a capacitor in LED bulbs?
There are 2 types of mains operated LED:
1. The cheap ones which are powered by a voltage-dropper-rectifier circuit , where the dropper function is carried out by a mylar capacitor,of up to 2 microfarads . There is also an electrolytic of around 100 microfarads which prevents surges and smooths the DC voltage.
2. Then there are the real LED lamps which have a small driver module, which is a buck converter, controlling the current supplied to the string of LED’s. Generally, this is about 300 mA. The voltage varies according to the rating of the lamp, from about 25V to 80 V. There is usually high voltage electrolytic and a low voltage one in the driver module. These are for smoothing the HV input and LV output.
https://www.quora.com/What-is-the-purpose-of-a-capacitor-in-LED-bulbs
Tomi Engdahl says:
Replacement of Defective Capacitor in E27 LED Bulb
https://www.instructables.com/Replacement-of-Defective-Capacitor-in-E27-LED-Bulb/
Tomi Engdahl says:
Selecting the right capacitor to ensure longer life of LEDs
https://www.electronicsb2b.com/important-sectors/leds-led-lighting/right-capacitor-to-ensure-longer-life-of-leds/
Tomi Engdahl says:
https://www.facebook.com/groups/electronichobycircuits/permalink/3703399729684709/
“So i just built a house after a house fire. I’ve installed all LED lighting. Occasionaly thay flicker/strobe. I’m thinking a capacitor installed at the 200 amp box. What size cap would i need, or will it make a difference?
Thank you for any info”
For first you need to figure our the reason for led flickering and then figure out how to fix it.
Are leds wired to dimmer – could be that led and dimmer are incompatible with each other. Can also be issue with some “smart” switches.
Wired with normal light switches and flicker when power off – could be some power leakage on switch and/or wiring. Check them and maybe try other type of led bulbs.
Flicker when powered on – bad contacts, power quality issue on incoming power, poor quality led light product working baddly
Tomi Engdahl says:
https://www.facebook.com/groups/electronichobycircuits/permalink/3793283644029650/
How to OPERATE 220v AC LED change in to 12v DC?
My answer:
Depends on LED construction. If it is a bulb with one small LED in producing the light (indicator light and some 1W or 3W bulbs), then taking out the original 220V to LED circuit (however it was built) and replacing with 12V LED driving electronics that provides same power to LED should do (resistor, transistor, switch mode regulator etc..). The white LED voltage drop is typically around at 3-3.5V.
If that 220V AC bulb had many LEDs in it or uses COB module, those are harder to convert because usually LEDs are wired in series that oftet needs more than 12V volts to operate – a current regulated voltage boosting switch mode power supply is possible to use if you have idea on the right voltage and current for those LEDs.
Tomi Engdahl says:
How to repair led bulb
https://m.youtube.com/watch?v=dwovISGsnc4&feature=youtu.be
Tomi Engdahl says:
LED component itself operates at DC, but when run from mains power needs power supply that can have whatever power factor depending on how it is built. I have led lights that are capacitive load, some are inductive, some take pulsed power and some other something else.