Few days ago I read The remarkable evolution of modern fiber-optic connector inspection probes article tells about the current state of fiber inspection. Especially with multifiber connectors such as MPO, MT, and MXC microscopic connector endface dirt and debris cause light reflections and attenuation – the enemies of optimal optical signal transmission. Thankfully there now exist excellent quality and easy-to-use tools for inspecting and cleaning fiber endfaces.About 15 years ago, the first indirect view “digital” fiber scopes appeared. Over time, suppliers developed large portfolios of modular adapter tips for their probes, allowing users to inspect very many connector types. Today, the innovation in this growing specialized market space continues.
That article made me to think on the fiber testing postings I have made over years. Here is list of them and some comments on them:
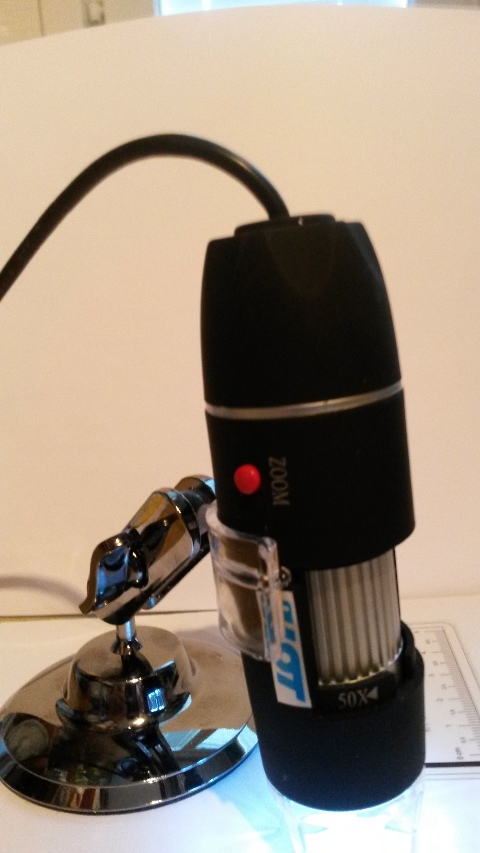
Many years ago I posted DIY fiber optic microscope article where I played with idea of usign cheap microscope to inspect fiber optics connectors. There I already wrote warning; “Remember to check that no power is present in the cable before you look at it in a microscope to protect your eyes! The microscope will concentrate any power in the fiber and focus it into your eye with potentially hazardous results.” Now at later time I thinks much safer for eyes, more convient and better to use is to for example a cheap USB microscope to view those fiber ends. With microscope you don’t risk your eyes and you get more clear view on computer or smart phone screen. If you accidentally start to measure live fiber, the worst that can happen is that you damage the camera (very high power laser signal can potentially damage image sensors).
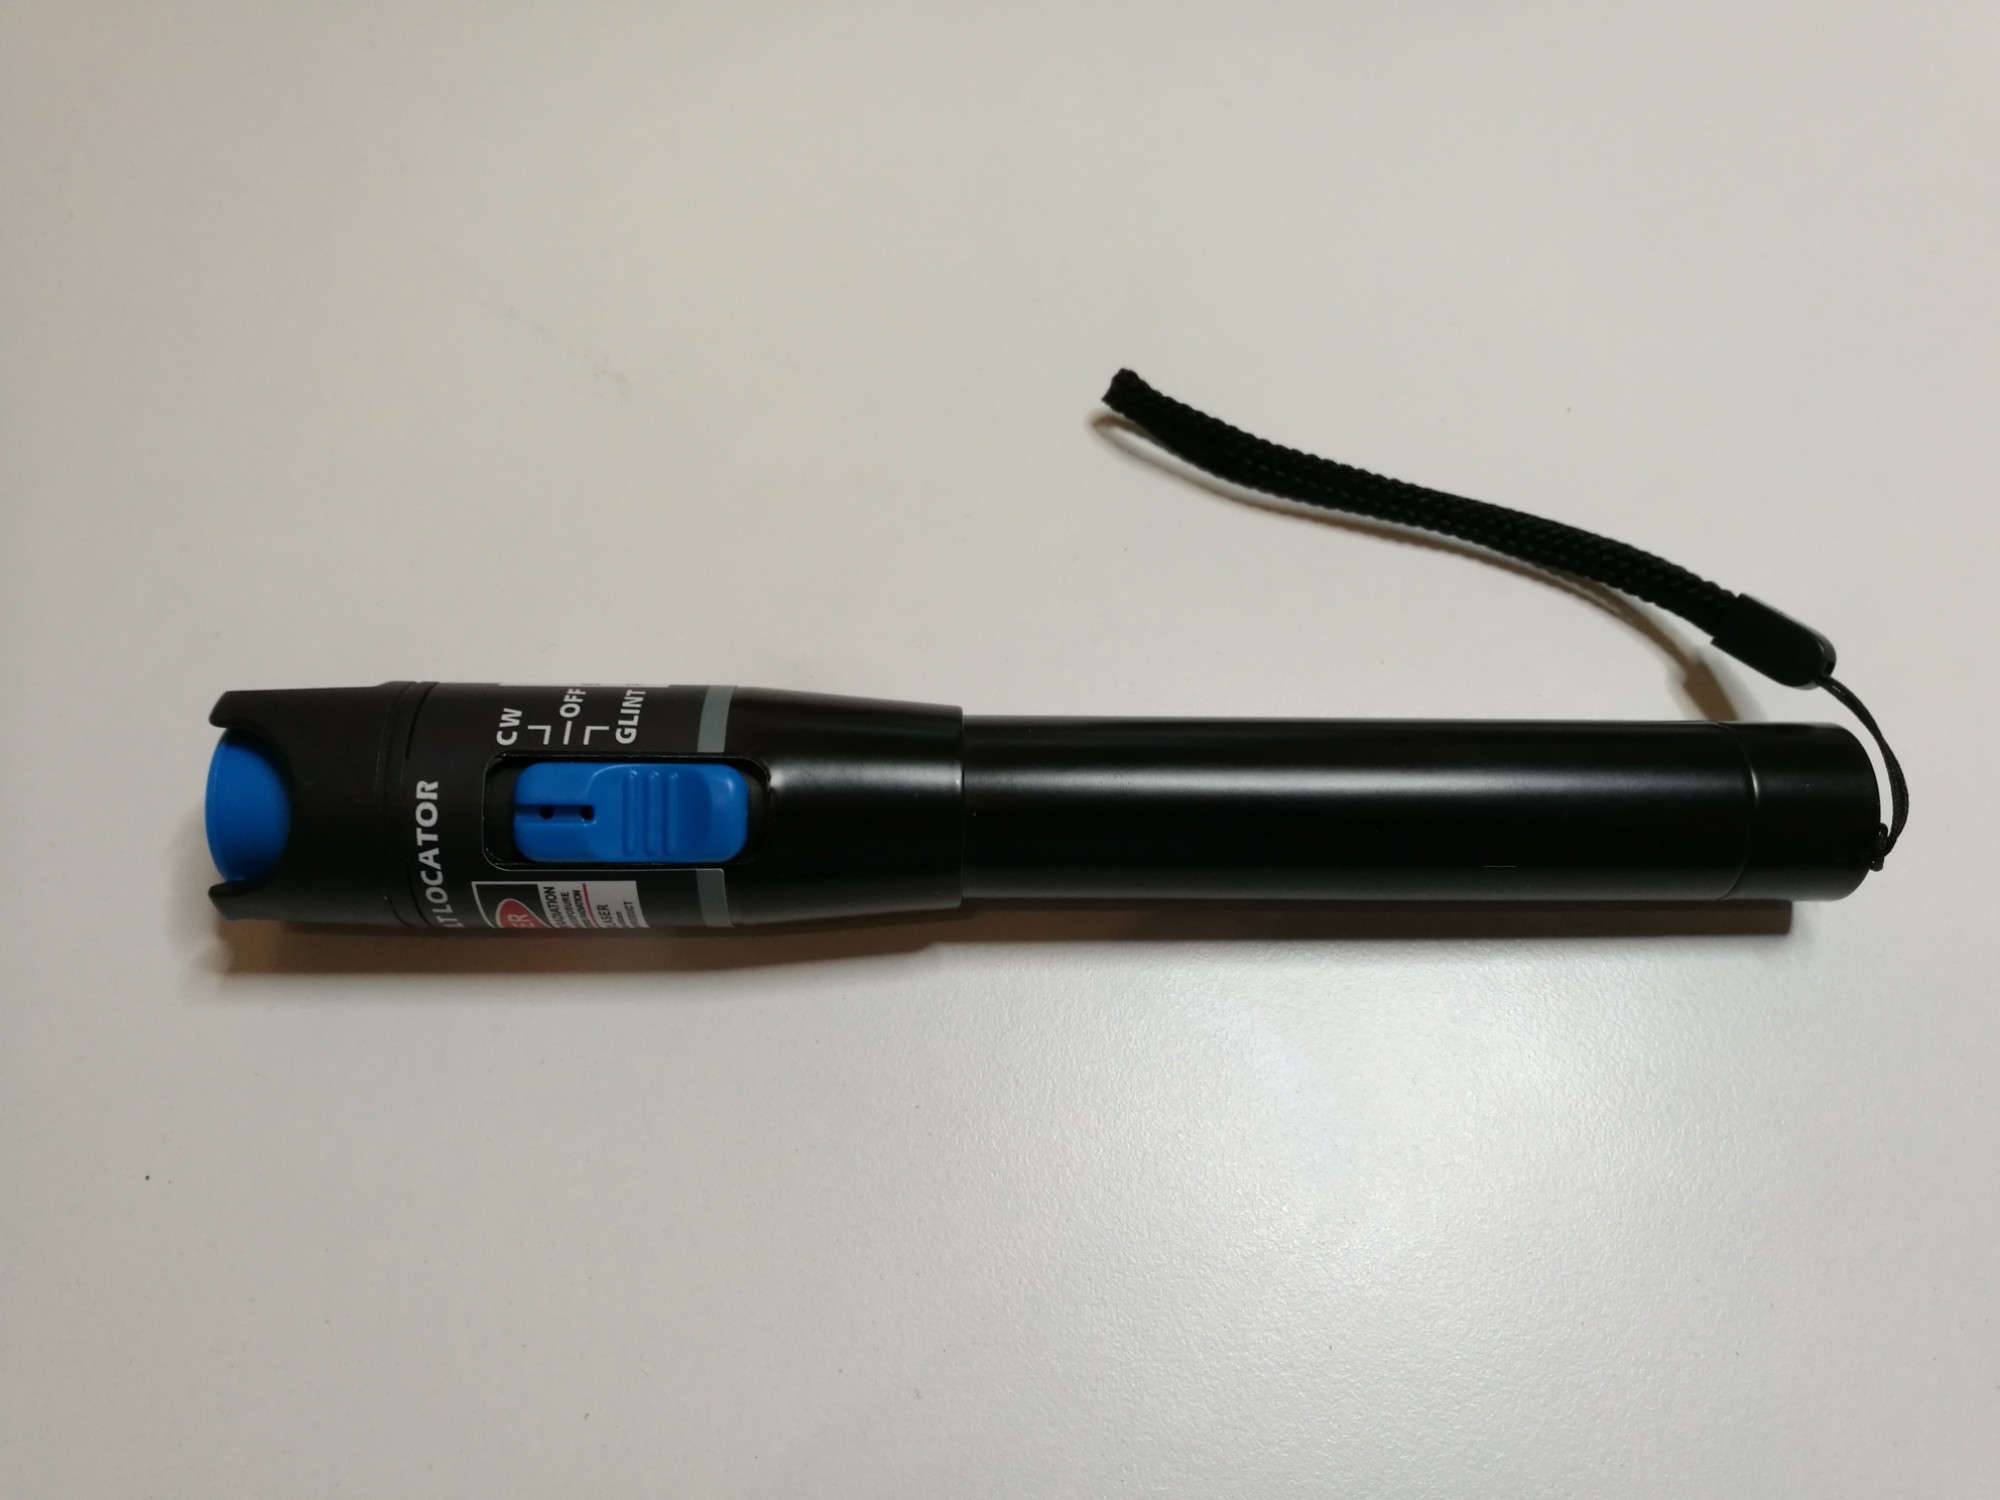
Product tests for Cheap fiber optic visual fault locator is up to date.Attach the light source a fiber optic cable to test to the visual tracer and look at the other end to see the light transmitted through the core of the fiber. If there is no light at the end, go back to intermediate connections to find the bad section of the cable. This is very useful intrument that can nowdays bough cheaply.
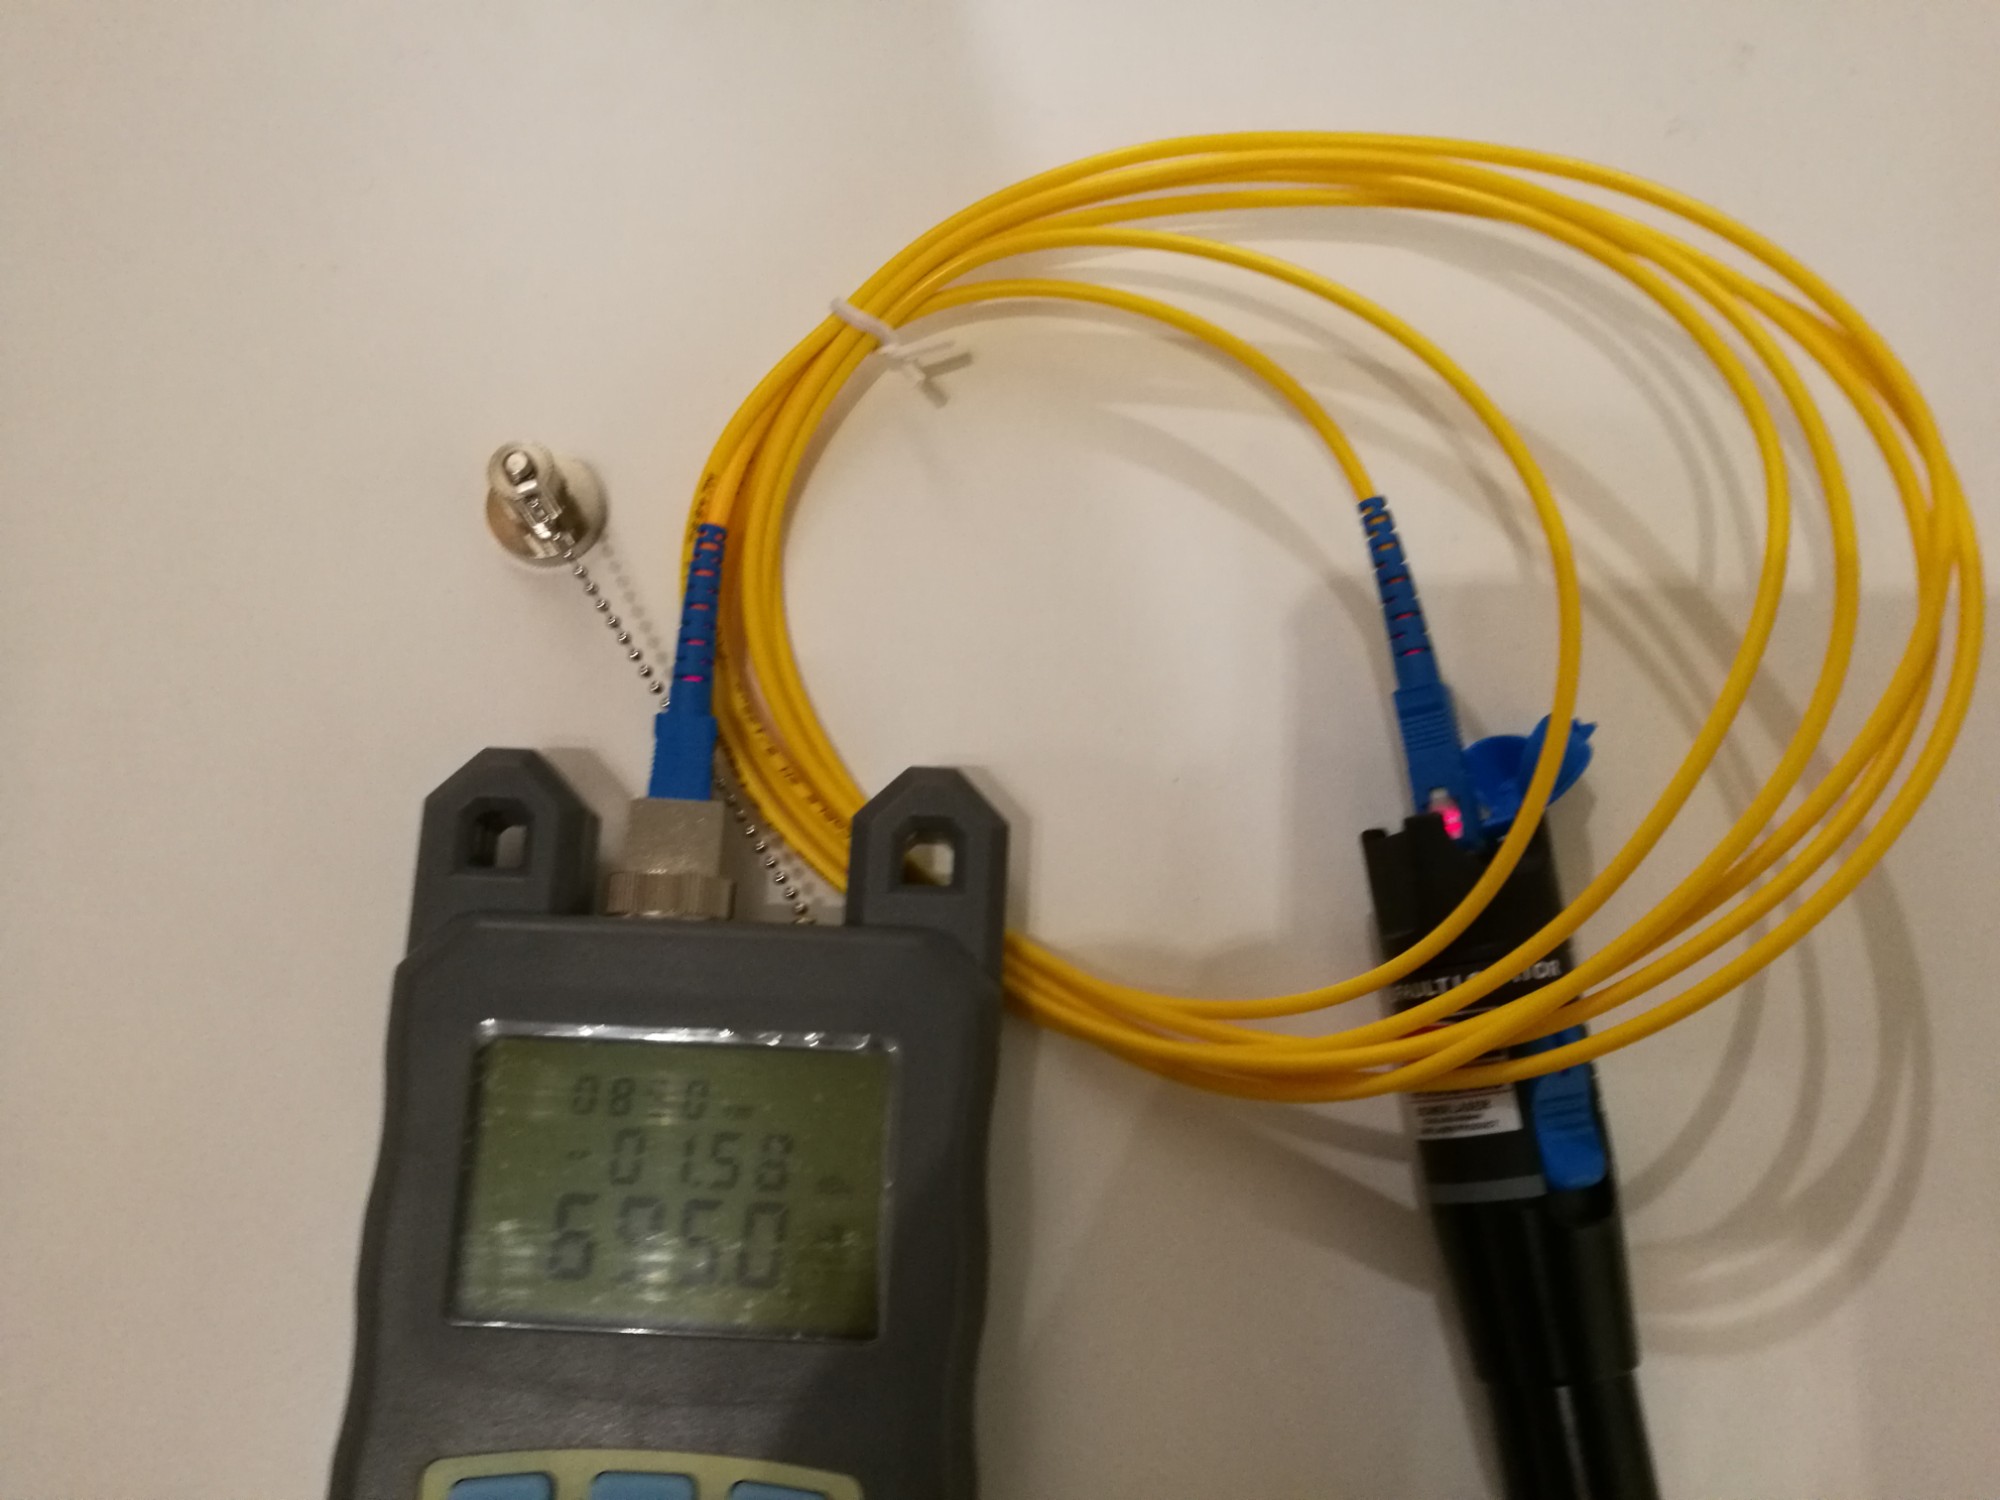
My product test Fiber optics power meter is up to date.
Fiber optic testing (part 2) posting has a collection of useful videos on fiber testing with the instruments I tested.
Many years ago I wrote Fiber optic testing ideas posting that had some useful ideas, but seems to need also some update.
I mentioned that EDN design idea LED flasher checks fiber-optic strands allows you to verify fiber-optic strands. It uses two high-intensity flashing LEDs (red and yellow) that you can see at the far end of multi-mode fiber link (up to 1 km). The link to article is no longer up to date, but the article can be now found at http://www.edn.com/design/power-management/4312724/LED-flasher-checks-fiber-optic-strands. Instead of building DIY hack, nowdays you could with same cost get a cheap commercial fiber testing device like Cheap fiber optic visual fault locator I tested some time ago.
In that article I wrote:
“Invisible infrared radiation normally carried in optical fiber can be made visible with a video camera. Many video cameras will detect IR radiation quite well, both black&white and color cameras (usually as RED but can be other color as well). The camera on your cell-phone can also usually work as a really cheap “laser” detector that nearly every tech carries. For example N73 cellular phone camera showed 1300 nm light as weak blue color on the fiber that has the signal in it. Because I can see IR remote control signals (850 – 950nm) on cellular phone camera, should 850 nm IR signals from fiber show as well.”
Update to it:
I dit dome testing with newer phones, I found out that some newer smart phone cameras do not react to 1300 mn infrared light at all.
I tested with new Honor 8 phone, and it’s camera did not seem to react to 1300 nm signal at all. I did the same test with Samsumg J5, and also it did not react to 1300 nm signal at all.
In am not sure if that is intentional or unintentional feature on modern smart phones.
Why the camera did not react? It could be caused by differences in optical filters and/or sensors. Maybe there is filter to block out invisible IR that could cause image quality problems when taking picture in sunny days outside.
I am winderng what would be a good economical replacement for that. One potential device is cheap USB microscope I tested, because it reacted to 1300 nm signal (strong signal could be seen on the picture).
2 Comments
Tomi Engdahl says:
Fibre-Optic Network Testing: Avoid clogs and pains in Smart City & IoT projects
https://www.bicsi.org/uploadedfiles/PDFs/Presentations/Region_Events/dubai_17/Jean_Baptiste_Letang.pdf
Tomi Engdahl says:
1PCS New SC APC Optical Receiver FTTH CATV Passive Optical Receiver With WDM Inch F Head Output Free Shipping To Brazil
https://www.aliexpress.com/item/1005003139638282.html?src=criteo&albch=criteo_New&acnt=criteo-LF&albcp=157651&device=pc&clickid=650028f468362714c1a7c4896fe3888c_1694509300_1005003139638282&aff_fcid=5e5cffeb5b574a36bab1fbf83f20ab73-1694509347590-03725-UneMJZVf&aff_fsk=UneMJZVf&aff_platform=aaf&sk=UneMJZVf&aff_trace_key=5e5cffeb5b574a36bab1fbf83f20ab73-1694509347590-03725-UneMJZVf&terminal_id=a84dd682a66047c694dfe5628f2eb974&afSmartRedirect=y